Emerging Revolutionary War welcomes guest historian Sean Chick
On October 7, 1780, Britain’s attempt to regain at least part of the rebellious North American colonies was dealt a major blow at King’s Mountain. The rebels rejoiced, since it was their first major victory since 1777 and it came after the twin disasters at Charleston and Camden. Thomas Jefferson, then governor of Virginia, considered it the decisive battle of the war. Years later, Theodore Roosevelt echoed that sentiment. In 1930, when the site was set to become a national park, Herbert Hoover gave a speech. For the embattled president, it was an attempt to shore up his falling support and vindicate his strategy to peel southern states away from the Democratic Party. Hoover said “This is a place of inspiring memories. Here less than a thousand men, inspired by the urge of freedom, defeated a superior force entrenched in this strategic position. This small band of Patriots turned back a dangerous invasion well designed to separate and dismember the united Colonies.”
Hoover, understandably, never mentioned the atrocities committed. Many were executed after the battle. Nor did he mention that King’s Mountain was not a contest between redcoats and rebels, but brother against brother. The only British man present was Major Patrick Ferguson. His command was made up entirely of Loyalists. His second in command, Captain Abraham de Peyster, was from New York City.
Joseph Galloway (courtesy of NYPL)
Few groups in American history are as forgotten as the Loyalists and few were as complex. They were a varied lot, often making up the highest in colonial society, including wealthy merchants and colonial officials. They often included the very lowest in the society, such as recent immigrants, slaves, indigenous, and subsistence farmers. Their ideology was in many ways not radically different from those who rebelled. They were generally not in favor of absolute monarchy or the supremacy of Parliament but simply favored union with Britain and slow reform. A few, such as Joseph Galloway, were part of early protests against British colonial policy, but were unwilling to jump into the chasm of revolution. Some, such as South Carolina merchant David Fanning, were merely aggrieved and sought to settle scores. Others were on the margins of society and saw the colonists, or at least the revolutionary colonial elite, as their real oppressors.
The Loyalists were at first spurned by the British high command. Major General William had over 30,000 men under his command in 1776 and Loyalists would have added to the logistical strain. He also thought a soft war policy that he hoped would induce the colonies to return, and therefore it was reasonable to avoid civil war. Yet, by 1777 the British were using some Loyalist regiments. They would fight in John Burgoyne’s ill-fated drive on Albany and served as rangers at Brandywine.
Did the Battle of Moores Creek Bridge help keep the British away from the southern colonies during the first half of the war?
Months before its colonies officially adopted their Declaration of Independence, the British army was reaching a critical juncture in its war strategy: with the colonies in rebellion, where should they focus their attentions? The war was picking up steam and the British were looking for a stronghold in the colonies that would gain them resources such as men and supplies. They turned their eyes south.
The general impression of the southern colonies was that they were poorer and weaker than their sister colonies in the north. They also had been receiving word of heavy Loyalist sympathies in both the backcountry of South Carolina and the coastal areas of North Carolina, where large populations of German and Scottish immigrants had settled. Indeed, by the fall of 1775, Loyalist recruitment seemed to be quite successful. One evidence of this was at the First Battle of Ninety Six in November 1775, when nearly 2,000 Loyalists met a paltry force of not quite 600 patriots. Though this first Revolutionary War battle south of New England ended in a truce, British confidence was high.
The Royal Governor of South Carolina, Lord William Campbell, had fled the colonies by September 1775, leaving the colony mostly in the hands of the Patriots. That made the ultimate goal at this point in the southern colonies to capture the wealthy and strategic port of Charleston, South Carolina. Meanwhile, the Royal Governor of North Carolina, Josiah Martin, convinced British commanders to target key points along their route through his colony as they advanced on their mission. And as 1775 turned into 1776, plans were set in motion.
On January 10, Martin issued a proclamation calling on all subjects loyal to the Crown to take up arms against the rebellion in the colony. Authority was given to Loyalist leaders throughout the colony to recruit militia and gather all necessary provisions to muster in Brunswick, NC.
A copy of Josiah Martin’s Proclamation from January 10, 1776. Library of Congress.
By mid-February, a contingent of several thousand loyalists was gathered at Cross Creek, NC, preparing to march towards their goal. Among those recruited were the famed Scotch Highlanders. Though not all joined the Loyalist cause, the Highlanders’ reputations as fierce warriors preceded the impending war in the colonies. This reputation may have stemmed from the Jacobite rebellion in the 1740s as well as British assumptions at the time that the HIghlands were a lawless land due their clan-based culture.
Loyalists weren’t the only militias stirring along the Carolina coast. Patriot militias had begun forming at the first news of Loyalists gathering as early as August 1775. In fact, some of those militias formed in Wilmington, NC became the foundation of the 1st North Carolina Regiment of the Continental Army and in February 1776, they were led by Colonel James Moore. At that time, they were joined by additional militiamen from the surrounding area, led by Alexander Lillington and Richard Caswell. Their goal was two-fold: protect Wilmington and prevent the Loyalist forces from reaching the coast.
By February 20, 1776, a clash between the British and Patriot forces was inevitable. British commander Donald MacDonald began to move his 1,600 men from Cross Creek towards his rendezvous point at Brunswick, only to find his way impeded along the Black River by Caswell’s blockade. On February 25, MacDonald had managed to get across the river and Caswell moved his 1,000 Patriots back to Moores Creek Bridge. There they set up defensive earthworks, prepped their two artillery pieces, and prepared for battle.
A map of the Moores Creek campaign, February 1776. NPS/Moores Creek National Battlefield.
At 1:00 am on February 27, 1776, MacDonald’s second-in-command, Donald McLeod, led the British troops on their march towards the Patriot position. Arriving at an abandoned camp on the west side of the bridge around 5:00 am, a brief exchange of fire alerted the Loyalists to the Patriot sentries guarding the bridge, and ultimately, the Patriot forces lying in wait.
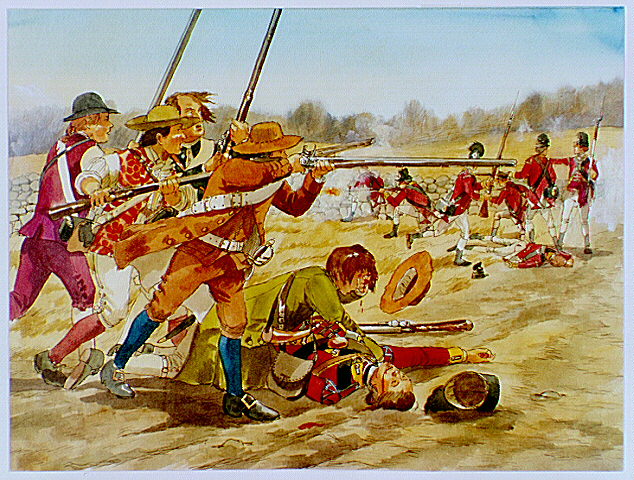
McLeod with 50 men attempted to cross the bridge and attack the Patriot defensive position, but the attempt was futile and disastrous. Heavy musket fire coupled with a barrage of two artillery units killed 30 almost immediately, including McLeod. The remaining Loyalists quickly retreated and the battle was over almost as quickly as it had begun.
Bill Ballard’s drawing of the decisive moment during the Battle of Moores Creek Bridge. NPS/Moores Creek National Battlefield.
So how important were these three approximate minutes of battle? This Patriot victory struck a huge blow to Loyalist recruitment in North Carolina – so much so that two months later, North Carolina’s delegates to Continental Congress were the first to vote for independence. And it created a rippling effect throughout the southern colonies, as one by one the royal governors were displaced and revolution took hold.
No longer could the British see the Carolinas as easy targets. They abandoned this initial southern strategy to focus their resources on the war in the northern colonies. For the next three years, significant battles and events that we learn about today took place, thanks in part to the dominating Patriot showing at the Battle of Moores Creek Bridge.
If you’re interested in learning more about the Battle of Moores Creek Bridge, I strongly encourage you to visit Moores Creek National Battlefield’s website as well as their very active Facebook page. Both offer a wealth of information and additional resources for folks to explore.
Two hundred and forty years ago, January 17, 1781, Brigadier General Daniel Morgan strategically manuevered his Colonial forces to defeat the British, led by Lieutenant Colonel Banastre Tarleton, at the Battle of Cowpens.
What can we learn from the Battle of Cowpens? Military strategy, yes. Historical knowledge, absolutely. But as we near the 250th commemoration of the American Revolutionary War, how do we turn the battle into relevancy for today’s modern society?
As historians, we can find meaning and connection to places and events at their face value. It’s a natural ability we have ingrained in our knowledge-seeking souls. What about those that can’t and don’t? How do we make them relevant to them so that our history is not forgotten?
The answers lie in the stories we tell and how we tell them. Instead of rehashing the specific details of the Battle of Cowpens, I’m going to try something a little different: think of a time when you were able to not only prove that someone’s opinion of you was wrong, you used it to your advantage to achieve a goal. Go ahead, I’ll wait.
Now recall that a key element of Morgan’s strategy was his use of the British underestimation of the Colonial militia forces. Before the Battle of Cowpens, Tarleton, like many British commanders, believed that the militia were mostly untrained or inexperienced civilians that would flee in face of a real battlefield. To be fair, this was witnessed at several battles (Battle of Camden on August 16, 1780 immediately comes to mind) so it’s a fair assessment.
Using this knowledge to his advantage, Morgan set a trap. Putting his militia front and center of his second battle line, he ordered them to fire off two volleys at the oncoming British before falling back. The perspective fueled the British assumption that the militia were fleeing the battlefield, and Tarleton drove his men forward… and right into Morgan’s trap.
Fighting between soldiers from Tarleton’s Legion (British) and Morgan’s Army (American Continental) by Don Troiani. NPS Commissed Artwork.
Perhaps if Tarleton had not underestimated the militia, he would not have found himself in the only successful double envelopment in the American Revolution. But more to the point, Morgan took strategic advantage of the British perception of the militia’s capabilities.
While this battle’s lessons learned are easily applied to modern military education, how can we apply them to our everyday civilian life, particularly the lesson that comes from Tarlton’s mistake and Morgan’s strategy relating to the militia? The motto “never assume” comes to mind first. At the very least, it compels the message “Don’t let what other people may or may not think of you prevent you from achieving what matters most to you.” I personally like the potential of “If someone doesn’t see value in your abilities, prove them wrong.”
What life lesson do you pull from the battle’s story?
Emerging Revolutionary War welcomes back guest author Drew Gruber.
Since Arnold’s raid in January the situation for Virginians in the Spring of 1781 was deplorable and growing worse. Keeping soldiers shod and fed (besides properly armed and equipped) proved difficult. For example, Gen. Baron von Steuben noted that despite receiving 100,000 cartridges the Virginians simply lacked cartridge boxes to store them or even an adequate number of muskets to fire them. In Virginia, a colony defined by its deep waterways finding vessels to move men and supplies was also a major piece of the puzzle.
The Chesapeake Bay and navigable rivers provided quick access into the interior of Virginia and both sides vied to control them. Previous campaigns in Virginia and along the Bay highlighted why towns like Portsmouth, near the confluence of the James River, and the Chesapeake Bay could help armies control large swaths of the largest and most prosperous colony. Of course, access to vessels of a variety of sizes was necessary to ensure the control of not only Virginia but Coastal North Carolina and Maryland.
Gloucester Point 1755, inset from original owned by the Mariners Museum.
Thankfully by March 1781 Virginians had an upper hand over their adversaries not only in the number of boats but the means to outfit, repair, and support an ad-hoc navy. It was the culmination of years of effort and ingenuity which began just after Virginia declared its independence.
Alongside Virginia’s establishment of a system of public stores and the creation of a standing army a shipyard was on the short-list of priorities for the fledgling independent state. In June 1776 the Virginia Committee of Safety empowered shipbuilder John Herbert to “examine all such places upon the James River or its branches…proper and convenient for erecting ship-yards…”1 Herbert selected a bend in the Chickahominy River just a dozen miles west of Williamsburg.
The Virginia State Navy appears to have been amorphous and inconsistently armed between June 1776 and the spring of 1781. At various points it consisted of about a dozen ships, although the term ‘ship’ may be generous descriptions for some of these vessels.2 According to Charles Paulin’s Navy of the American Revolution despite Virginia leadership’s zeal to fund additional ships, marines, and infrastructure to support coastal defense, the vessels were largely undermanned and poorly armed. To our modern sensibilities and perhaps to the men and women of the Revolutionary era the names of the “armed boats” which comprised Virginia’s navy are less than inspiring. For instance, the ships Experiment and the Dolphin don’t give off an air of martial prowess but still sound better when compared to my personal favorite, the Fly.
Still, the Virginia General Assembly pushed to create and maintain a more effective naval system and in 1777 appointed James Maxwell as Superintendent. He apparently oversaw the operation at the various shipyards, rope works, foundries and all the materials and men needed to create and maintain an effective navy. Maxwell’s base of operations at the Chickahominy yard included over 150 acres of stores, barracks, and other infrastructure essential to the maintenance and creation of a vast flotilla.
Although the Chickahominy yard was ably led and with copious old growth timber at their disposal the lack of manpower persisted. Maxwell reported to Virginia’s Gov. Jefferson that in outfitting two vessels they relied on volunteers.3 In the same letter to the governor, Maxwell noted that the term of service for the crew of the Jefferson expired and he was “detaining them Against their will.” Despite setbacks and the shortage of able bodies the shipyard kept Virginia float.
The information available in the papers of Williamsburg Public Store and the Calendar of State Papers provides a snapshot into the day-to-day operations in the naval yard.4 However, a letter written in February 1781 provides the best insight into the effectiveness of the operation. Capt. Beesly Edgar Joel wrote Gov. Jefferson from Williamsburg commenting that the Dragon (a much better name) was under water rendering it, obviously, unfit for service. Within five days it was floating and on day six was sailing down the James River.5 In an era obviously devoid of pneumatic lifts this quick turnaround speaks volumes as to the facility’s capabilities despite its handicaps.
Early American Shipyard, image from Abbot’s 1908, “American Merchant Ships and Sailors.”
Maxwell’s operation at the Navy Yard grew slightly by March 1781 as the state prepared for what was certain to be an intense spring campaign. Maxwell reported that he had 96 guns with the majority being four pounders but lamented that his full compliment of sailors should be 590 whereas he had 78 men to staff 7 ships. Two additional ships were ready but had no crew to speak of while 4 of his operable boats had less than 10 men serving on them.6 This would have to suffice.
That same month, reports flooded into Richmond from various points near the Chesapeake Bay that British reinforcements had arrived in Portsmouth to support Arnold. Within a few short days various Virginia arsenals, warehouses, and even shipyards were being instructed to police up their men and materials and move them west out of the possible path of destruction. Virginia could not afford another disastrous raid like the one they experienced in January.
As predicted, British Gen. Phillips left Portsmouth on April 18th, with over two dozen boats and approximately 2,000 men. It happened quickly. Virginian Rodham Kenner recalled their retreat as Phillips combined force sailed west up the James River.
“the whole of our little fleet which was in this part of the Bay was driven up James River a much Superior British force, and into the Chickahominy River to what was called the Ship Yard: whilst our little fleet composed of the following Vessels to wit the Ship Dragon, the Brigg Jefferson and the Thetis a 36 gun Ship”7
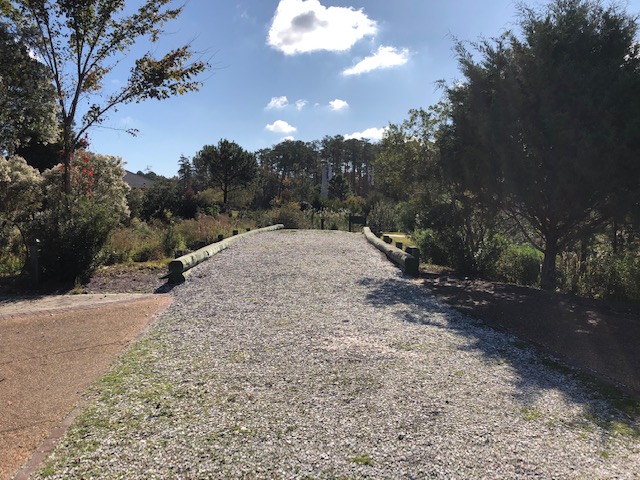
The following morning, on April 19, British Col. John Simcoe landed at Burwell’s Ferry with a force of Jagers, light infantry and the Queen’s Rangers. The Ferry, located at the confluence of the James and Chickahominy rivers sat scarcely a few miles from Maxwell’s shipyard. Phillips ordered Simcoe to “beat up any party who might be in ambuscade there.”8 Finding no ambush this elite force quickly marched across the Virginia Peninsula towards Williamsburg.
Burwell’s Ferry Landing, photo from “The Post Script” published in April 2020 by Kate Gruber
A small force of Virginians, apparently under the command of Maj. Armistead briefly skirmished with Simcoe’s men as they pushed east towards Williamsburg.9 Simcoe’s men continued east along the old Yorktown road as various Virginia militia units melted away before them eventually arriving in Yorktown itself. As this was unfolding British Lt. Col. Robert Abercromby (Ambercombie) with his light infantry paddled up the Chickahominy towards the shipyard. Over a dozen flat boats, supported by perhaps as many as a dozen additional vessels turned into the mouth of the Chickahominy River from the James River – a few miles of the shipyard.
Although few primary source accounts describe the British attack on the shipyard Virginia pensioner Joseph Saunders provided the best description so far. Although he was recalling the event almost fifty years after the fact, his deposition has a surprising amount of detail.
“They sent a number of gun boats up to our shipyard to destroy what was there. I had filled my galley with naval stores to take up the River to conceal them but wind and tide being against me could not go on, came to, put a spring on my cable, and awaited their arrival. It was not long before they came in sight and as soon as near enough I discharged my cannon at them, sunk my vessel, and made my escape to shore…”10
Arnold’s report to Henry Clinton is rather vague as was Virginia’s Lt. Governor David Jameson when he wrote James Madison seven days later on April 28. “When they went into Wbg some of their Vessels with the flat Bottomed Boats moved up to Chickahominy—while there they destroyed the Ship Yard, the Thetis, the Stores &c. &c.”11 Besides untold stores, and raw and finished materials, at least two large vessels were destroyed, either at the hands of their own crew or Ambercromby’s amphibious infantrymen. Besides the limited contemporary reports from soldiers, sailors, and Virginia legislators, myriad archaeological reports highlight the effectiveness of the British raid.
The inferno of the burning yard, ships, stores, and supplies was so large that it could be seen several miles away later that evening. James Innes, commanding Virginia militia who were fleeing west towards New Kent County, recalled in his letter to Thomas Jefferson that, “They possessed themselves of the Ship Yard about 4 o’Clocke yesterday, and I am apprehensive from the fire discoverd in that Quarter last night they have totally destroyed it.”12
According to William Lowrie, the Dragon was “burnt by the British at Chickahominy Ship yard.”13 Both Lowrie and Saunders have ties to the Dragon and it must have been difficult to watch the ship which had served the cause of liberty for almost five years slip beneath the surface. In fact, The Dragon was approximately 81 feet long and roughly matches the size of a one of the two vessels still sitting in the bottom of the bottom of the Chickahominy River today.14 The second vessel which has also been surveyed in myriad cultural resource reports is substantially shorter and has been hypothesized to be either the Lewis or Safeguard.15 In fact, on March 20th 1781 Saunders was placed in command of the Lewis which he scuttled almost a month later a few yards from the wharf at the shipyard.16
Artist interpretation of vessel Remains, “Historical and Arcehaological Investigation of the Chickahmoiny Shipyard Site,” a thesis by Jeffrey D. Morris, C. 2000., Pg. 109
Today the site of the shipyard is on private property and the underwater resources are protected by the Code of Virginia § 10.1-2214 which empowers the Virginia Marine Resources Commission with the authority to permit underwater archaeological investigations and makes recovery of underwater archaeological materials illegal without a permit. Trespassing on both land and water is unlawful which helps protect the known and unknown archaeological resources. Without stronger primary source materials like pensions, maps, and letters from soldiers and citizens artifacts become the key to understanding many Revolutionary War events like this one. Every button, nail, and cannonball when professionally recovered and systemically documented will provide us with the best chance to fully understanding how this shipyard contributed to the war for American independence.17
Maxwell’s shipyard never recovered however the Virginia State Navy has escaped wholesale destruction and would live to fight another day. As Phillip’s soldiers and sailors moved west up the James River, with the smoke from the Shipyard bellowing another naval showdown was brewing closer to Richmond.
Sources:
Naval Document of the American Revolution, Page 342
Paullin, Charles O., Navy of the American Revolution. (1906). Page 413
“Capt: Jas: Maxwell to the Governor, January 1, State Ship Yard.” Calendar of Virginia State Papers. Vol. 1., Page 409.
Williamsburg Public Store records, transcribed by Katherine Egner Gruber. Unpublished.
“B. Edgar Joel to the Governor, February 9, Williamsburg.” Calendar of Virginia State Papers, Vol. 1., Page 501. A day later, after hiring a pilot the Dragon ran aground and sat on the bar for three days and returned to the ship yard.
“To Thomas Jefferson from James Maxwell, 26 April 1781,” Founders Online, national Archives, last modified November 26, 2017
A letter from Thomas Jefferson to Benjamin Harrison on April 22nd notes the two ships in the Chickahominy as the Lewis and Safeguard.
To find out more about underwater archaeology check out the Maritime Heritage Chapter of the Archaeological Society of Virginia. https://maritimeheritageva.org/
Emerging Revolutionary War welcomes back guest historians Karl G. Elsea and William W. Welsch for thefinal installment of their three part series
1770 drawing of Hessian three-pounder gun and limber (courtesy of Kriegskarten from Hessisches Staatsarchiv Marburg, Germany at http://www.digam.net/?str=177)
The v. Lossberg Artillery detachment:
Bombardier Conrad Volprecht was about 44 years old with over 27 years of service. He led the v. Lossberg artillery detachment consisting of another bombardier, 13 gunners and 3 matrosses, with two three-pounder guns and associated horses, harness, and limber.[i]
Over two years after the battle and being a prisoner Bombardier Volprecht gave testimony that indicated the sequence of battle for his detachment was roughly as follows: First went to field, second fired north, third ordered south, and fourth got stuck in the mud till the end of the battle. There is a problem though, the sequence that better fits the data from the battle was as follows: first went to field, second ordered south, third fired west, and fourth got stuck in the mud.
John Adams wrote “Facts are stubborn things. They cannot be altered by our wishes, our inclinations, or the dictates of our passions.” In studying firsthand accounts of the battles in the Revolutionary War they are sometimes not correct or even true. For example, there is an enjoyable firsthand account (written many years later) by a patriot Sergeant White (The Good Soldier White) that is often quoted in accounts of the battle. Parts of his story are no doubt true. The problem is that when Sgt. White states he was with “Lieut. Munroe, our late President of the U. States” and “I was the first that reach them [cannons],” and “They had all left it, except one man tending vent,” those specific parts of the story cannot be true. Hessian Lt. Englehardt would not have time to do all that he did and then cross the Assunpink bridge before the Jagers if artillery men from Sullivan’s column were that far up King Street. Facts from the battle mean that part of that story does not work.
The most important place in all the 13 states fighting for independence on December 26, 1776 from 8:00 am to 9:00 am was the long, narrow bridge over the Assunpink creek. It was held by Hessian Sergeant Muller and 18 men. Sgt. Muller was about 50 years old with about 32 years of service. The importance of this place was not fully realized by the Hessians, but the Patriots knew it had to be closed, and General Washington had two full brigades, Sargent’s and Glover’s, tasked with taking, as quickly as possible, and then holding the bridge.
At about 8:03 am Patriot General Sullivan was about one mile from Trenton center along the River road when he attacked the outlying Jager pickets. General Sullivan had the artillery fire several canister shots at the Jagers. This firing also served as a signal to General Washington so he would know his other wing was attacking. It was to be recalled that General Washington started his attack about 8:00 am on the Pennington road and he also was about a mile from Trenton center. This cannon firing was also a signal to General Ewing so he knew when to start his distraction. General Ewing heard the three cannon shots and he quickly followed with his guns and howitzers firing ten shots from across the Delaware River. General Ewing kept up his firing until he could make out that Patriots were approaching. The v. Knyphausen regiment was forming on Second Street and was the logical unit to resist any attack coming from the River Road.
Volprecht’s detachment with its two guns followed Lt. Fischer’s detachment east on Fourth Street from the Methodist church into the field north and east of the Quaker lane. Lt. Fischer’s detachment was falling back from its earlier engagement and picked up the v. Lossberg detachment as it passed by. It took longer for the v. Lossberg artillery detachment to prepare for the battle because the horses had to be collected, harnessed, hitched, and the guns limbered. Fischer testified that the “cannon were unhorsed, and the horses unharnessed and brought back again into the stable” from the cancelled early morning patrol.[ii] For the morning patrol the horses had been hitched and guns limbered at 4:00 am but the patrol was cancelled so the men/horses/limber/guns were brought back to the Methodist church and waited for sunrise to unhorse.
The infantry of the v. Lossberg and Rall regiments followed Volprecht’s detachment into the field. It was in this field that these two regiments would form a line for battle. While waiting for the v. Lossberg regiment to form Volprecht was ordered by Lt. Weiderhold, “Artillery men, come here with the cannon” meaning they were to join the v. Knyphausen regiment.[iii] The v. Knyphausen regiment was on Second Street heading to the open field just east of Trenton and away from the Assunpink bridge. Volprecht and his v. Lossberg artillery detachment moved south on Quaker lane, linked up with the v. Knyphausen regiment, and set up his gun position facing threats coming from Trenton. The following map presents Trenton as it was in 1776.[iv]
While this was happening on the Hessian side, the right wing of the Patriot forces was moving east on River Road. General Sullivan rushed two of his brigades toward the Assunpink bridge. Neil’s battery with Sargent’s brigade and Sargent’s battery with Glover’s brigade made it to the bridge and across. Glover’s brigade with Sargent’s battery continued along the Assunpink creek to cut off possible exits for the v. Knyphausen regiment. St Clair’s brigade was moving east on Second Street with Moulder’s (three four-pounders) and Hugg’s artillery (two three-pounders).
Hessian Bombardier Volprecht testified that he fired his gun five times and the other gun fired one time.[v] One of those six shots hit the fore horse of one of Hugg’s three-pounder guns as they advanced in support of Patriot St. Clair‘s brigade. John Greenwood, a fifer in the 15th Continental, recorded that one of Hugg’s guns had the fore horse shot by a Hessian three-pounder gun, ”the ball from which struck the fore horse that was dragging our only piece of artillery, a 3-pounder. The animal, which was near me … was struck in its belly and knocked over on its back. While it lay there kicking the cannon was stopped.”[vi] That was the only hit scored by the Hessian artillery that day. St. Clair’s brigade with Col. Stark’s infantry in the lead applied great pressure causing the v. Knyphausen regiment to pull back farther east. Volprecht’s artillery detachment pulled back with the regiment.
As the Hessian artillery detachment pulled back east disaster struck both guns. Volprecht had been ordered into a valley without the ground being checked. Both guns got stuck in the mud. The rest of the battle the men of the artillery, with some aid from nearby infantry, was spent trying to extract the guns from the mud. One gun was extracted just before the surrender, the other gun was extracted after the battle was over.
Mud ended the third artillery engagement. The battle at Trenton was over. The Patriots had a great victory. What is shocking was the limited number of shots from the Hessian artillery. The Rall artillery detachment fired twelve solid shot and one grape, the v. Knyphausen artillery detachment fired “seven or eight shots,” and the v. Lossberg artillery detachment fired six shots.[vii] These few shots lend support for how quickly the Patriots won the Battle of Trenton.
Sources:
[i] William S. Stryker, The Battles of Trenton and Princeton (The Riverside Press, Cambridge, 1898), 388
[ii]Hessian Documents of the American Revolution, Morristown National Historical Park, ML, The Affair at Trenton Dec. 26, 1776, English Translation, ML 337
[iii] Hessian Documents of the American Revolution, Morristown National Historical Park, ML, The Affair at Trenton Dec. 26, 1776, English Translation, ML 277
[v] Hessian Documents of the American Revolution, Morristown National Historical Park, ML, The Affair at Trenton Dec. 26, 1776, English Translation, ML 277
[vi] John Greenwood, Revolutionary Services of John Greenwood of Boston and New York, 1775-1783, 40-41. “the first intimation I received of our going to fight was the firing of a 6- pound cannon at us, the ball from which struck the fore horse that was dragging our only piece of artillery a 3-pounder.” Retrieved from https://archive.org/details/revolutionaryser00gree/page/38/mode/2u
[vii] Hessian Documents of the American Revolution, Morristown National Historical Park, ML, The Affair at Trenton Dec. 26, 1776, English Translation, ML 341
Emerging Revolutionary War welcomes back guest historians Karl G. Elsea and William W. Welsch
1778 sketch-map drawing of Battle of Trenton by Lt. Fischer (courtesy of William S. Stryker, The Battles of Trenton and Princeton, Riverside Press, Cambridge, 1988, page128)
The v. Knyphausen artillery detachment:
Lieutenant Friedrich Fischer was about 37 years old and had about 20 years military experience. He was the senior artillery officer in Trenton. For administrative purposes he saw to the needs of the men, and horses, and equipment for the artillery in Trenton. However, for tactical considerations he was a detachment commander to two three-pounder field guns and crews and horses and equipment assigned to support the v. Knyphausen Regiment. He was to follow their orders unless overridden by the Brigade leader, Colonel Rall. Lt. Fischer never made it to his assigned regiment. The reason was the rapid advance by the Patriots on all fronts.
Each regiment of the Hessians as they came to Trenton in mid-December was assigned a significant building, usually a church, to form its “center of gravity.” The v. Knyphausen regiment was assigned the Presbyterian church, the Jagers were assigned the Old Stone Barracks, the v. Lossberg regiment the English church, the dragoons were assigned the Quaker meeting house, and the Rall regiment several taverns. The Artillery was assigned the Methodist church at the northeast corner of Queen Street and Fourth Street. Thus, the artillery horses, harness, and limbers were at the Methodist church for the three detachments. Three of the neighboring houses to the Methodist church each contained the men for an artillery detachment.
Emerging Revolutionary War welcomes back guest historians Karl G. Elsea and William M. Welsch.
Part I
1770 drawing of Hessian three-pounder barrel (Drawing of Hessian three-pounder gun, dated 1770, at Kriegskarten from Hessisches Staatsarchiv Marburg, Germany at http://www.digam.net/?str=177)
The Rall Artillery Detachment:
It is well known that the Battle of Trenton saved the American Revolution from defeat. What is not well known is the story of two of the three Hessian artillery detachments and the description of their field guns. This series of articles tells the story of the three Hessian artillery engagements at the First Battle of Trenton. These three fights largely determined the victory for the patriots.
The field guns used by the patriots in the artillery engagement at Trenton were fairly well documented. The Patriots used British Armstrong design M1736 six-pounders, British commercial iron four-pounder barrels on Patriot designed carriages, and the Common Pattern British designed three-pounders (looked like scaled down six-pounders).
The Hessian three-pounder field guns were primarily designed to be beautiful, symmetric and fill both the roles of field (light) artillery and garrison (medium) artillery. The “brass” barrel was one caliber (caliber was equal to 3.01 English inch) thick at the breech, one half caliber thick at the muzzle, and was twenty calibers long from breech ring to muzzle. This symmetry came at a price, namely, the barrel alone weighted over 700 pounds. As a comparison, the 1776 designed British Congreve three-pounder barrel had a weight of 212 pounds and was 12.4 calibers long while the “Common” pattern three-pounder barrel used by the Patriots was 287 pounds and 14.5 calibers long.[i] This flaw in the Hessian guns concerning the weight required four horses to pull each gun and made each gun more vulnerable to sinking in mud. Field guns were supposed to be” light,” something these Hessian guns were not.
Part 1 of this article showed that a total of 23 ferry trips were required to move all of Knox’s artillery men, guns, horses, and carts across the Delaware River. In addition, there were other horses needed for the march to Trenton. Many of the likely 35 horses associated with senior officers and aids could fit in with the above 23 trips at a rate of a couple per trip, especially the ferry with only one cart.
There were six ferries operating to move the Continental Army across the river at McKonkey’s ferry site. Each of the six ferries could likely carry a maximum weight of roughly 8,750 pounds. That weight estimate comes from the intelligence report from Capt. Losbiniere on 22 December 1776 concerning the “7 flat-bottom boats which may carry about 50 men each and two ferry Boats, which may carry the like number” that were with Col. Cadwalader at Bristol ferry.[i] There is no reason to believe those ferries were different from those at used at McKonkey’s. If it is assumed a man weighed 150 pounds plus 25 pounds of musket and gear, then the weight for 50 men comes to 8,750 pounds. With those capabilities the Philadelphia Light Horse needed 3 ferries for their unit (8 horses and riders per ferry).
Possibly one more ferry trip for any leftover senior officers and aids horses was necessary. That is 27 trips total needed. With six ferries working that is four trips for all with three additional trips required. Those five round trips by the ferries were estimated by Washington in his plan to require six hours; however, it actually took a nine-hour period (6 pm to 3 am). The additional hours required for the crossing was likely explained by the floating ice and the increased river current driving the ferries out of position.
The question was raised about how difficult it would have been to transport the horses across the river. The somewhat surprising answer may be that it was not as difficult as many assume. No doubt a few horses were a problem; however, the majority of the horses probably presented few problems. How we surmise this is as follows:
Firstly, we can safely speculate that at least some of the horses had participated in earlier ferry crossings during the army’s previous movements and retreats. Those horses would remember that nothing was amiss in the crossing. Secondly, many of the farm horses transferred to pull guns had previous experience pulling carts and wagons across ferries to take produce to market. Thirdly, each team had a driver who knew the horses and he could strategically place the lead horse with a horse who had experience. As for the cavalry, each horse rider likely slowly leads his horse onto the ferry. Horses who see a previous horse move onto a ferry without incident generally lose their fear.
The following picture of a contemporary ferry crossing (1779) shows a typical crossing.[ii] This period ferry appears to measure about 48 feet long (without the two four-foot ramps) by eight feet wide. If one replaces the carriage in the painting with a field gun and limber then the person holding the reins would be the driver. Note the horses are in a pair; whereas, on a gun team there would be a thill horse in front of the limber and additional horse(s) in front of the thill horse.
Many of the campaigns and battles of the Revolutionary War are better understood if a study of horses was included in the analysis. Often, it was all about horses, or the lack thereof. Both General Burgoyne’s march south in the Saratoga campaign and General de Kalb’s march toward South Carolina show that the lack of horses was very important. As for the crossing of the Delaware, General Washington showed his skill in planning. More important, Washington was lucky. It was not the horses that drove the outcome but rather the bad weather and severe river conditions. These bad conditions set in place the delay that assisted the surprise attack.
[i] William S. Stryker, The Battles of Trenton and Princeton (The Riverside Press, Cambridge, 1898), 338
Emerging Revolutionary War welcomes guest historians Karl G. Elsea and William W. Welsch. Short bios of both historians are at the bottom of this part.
Part I:
The purpose of thisarticle is to further investigate General George Washington’s Christmas night crossing of the Delaware River in December, 1776, with added emphasis on the role of the artillery and horses This is the result of discussions and collaboration between the two authors.
In an earlier article published by The Journal of the American Revolution, the second author posed the question of just how difficult was the crossing. Given the weather, the river conditions, the expertise of the crews, and available original sources, this remains an unanswerable conundrum. However, new research is able to provide a better understanding of the challenges posed in crossing the cannons and horses.
In calculating the number of horses needed to move the artillery, authors have been initially tempted to use the numbers provided from John Muller’s Treatise on Artillery. Muller (about 1757) wrote that “A 3 pounder requires but 1 horse, a 6 pounder 2, a 12 pounder 3 of the light [field artillery] sort.” That quote assumed roads as they were in England and Europe, and relatively flat and firm, dry surfaces with well-fed and conditioned horses. Those conditions do not apply well for Revolutionary War America.[i]
There is a primary source that states a three-pounders was pulled by at least 2 horses. John Greenwood, a fifer in the 15th Continental, recorded “the ball … struck the fore horse that was dragging our only piece of artillery, a 3-pounder.”[ii] This was important information because a three-pounder gun could be pulled by a single horse according to Muller. Because the weather was rainy and sleety, with the ground becoming muddy, an extra horse was required. That Patriot three-pounder gun had at least two horses.
There were old expressions that give important insight into what a horse could pull. For example, “on flat, firm ground a horse or mule can pull its own weight ten hours a day, every day.” Also, “on rough ground a horse can pull half its weight with large wheels.”[iii] While those expressions offer what a well-fed horse could accomplish, we have no way of assessing the condition of the army’s horses, given that forage was a constant problem.
There was another issue concerning horses pulling in harness. Not all of their effort can be applied to the load being pulled. If there was more than one horse pulling a gun, then they were harnessed in tandem in America. The horse between the shafts for the limber was called the thill horse. In tandem the horse in front of the thill horse only had 3/4 of its draught applied to the load. If there was a horse before that one, then only half of that horse had the draught apply to the load. If there was a fourth horse in tandem, then only 1/4 of the draught can be applied. More than four horses in tandem provided no gain in pull and might make pulling harder. For example, cresting a hill with the Fore horse on down side and the Thill horse on the rise side of the hill would result in the forces being against each other.
There was another problem, if the ground was rough or muddy then one must reduce the draught for all the horses by half. If a horse had a rider, then that horse’s ability to pull a load was reduced by half.
A typical Colonial farm horse available for pulling battalion guns in Colonial America was probably between 14 and 15 hands tall and weighed between 850 and 1,000 pounds. Large draft horses like the Conestoga were not used on battalion guns, they were reserved for large wagons.
It seems very reasonable that each gun in Washington’s force had an extra horse added due to the conditions of the ground. With the information presented above, the following presents the math for a light six-pounder guns as used by Hamilton and Forest.
The “old” six-pounder (Armstrong design 1736) with carriage and limber and everything with which to utilize the gun weighted about 1,800 pounds. Adding 24 rounds of ready fixed ammunition adds 202 pounds for a grand total of 2002 pounds that must be pulled.[iv] The “old” six-pounder would normally be pulled by two horses according to Muller. The thill horse would provide about 1000 pounds of draught and the fore horse about 750 pounds for a total of 1750 pounds of draught with 2 horses. As the math suggests, there was a shortfall in draught (2002 vs 1750) which means that the horses would likely wear out in less than 10 hours of work. The shortfall noted could be significantly greater when the condition of the ground was considered. With the thill horse and two fore horses added as a pair, then an additional 750 pounds of draught was available (for a total of 2,500 pounds of draught). Because the army was moving by a road then the horses in front of the thill horse did not have to be in tandem and could be added as a pair. This calculation demonstrates the six-pounder likely had an additional horse. The calculations would be similar for the howitzers. That means the six-pounders, the four-pounders, and the howitzers each had three horses and the three-pounders each had two horses.
A typical colonial period ferry (flat) designed to carry a large farm wagon to market, as would be case at McKonkey’s and Johnson’s ferries, would typically be about 48 feet long and 9 feet wide. A light six-pounder gun with three horses (fore horses in a pair) would be almost 40 feet long. Same for the 5.5-inch howitzer. The track of a six-pounder would be 4 feet, 8 inches leaving some room on the side(s). A three-pounder gun with 2 horses (thill and fore) would be about 35 feet long. With that information one can see that each gun would require a trip on the ferry, and there would be some space along the side(s) for some artillerymen and/or horses.
At least seven artillery ammunition carts had to be used – one for each artillery company. In addition, Forest’s artillery company needed an additional cart because he had two types of cannon, and thus a cart for each type of cannon. It may be that Moulder also required two ammo carts to carry adequate ammunition for his three guns. Each cart with horses would require about 24 feet, so two carts could be taken on a ferry.
Thus, Knox’s artillery would require eighteen ferry trips to move all eighteen cannons, one for each cannon and team. Two trips required on a ferry for the four ammo carts (two carts per ferry) associated with Greene’s column (Forest, Hamilton, Bauman). Three trips required on a ferry for the five ammo carts (two carts per ferry) associated with Sullivan’s column (Sargent, Neil, Hugg, Moulder).
Company
Number and Type Cannon
Ferry Trips
Forest
Two 6-pounder gunsTwo 5.5-inch howitzersTwo ammo carts
222
Hamilton
Two 6-pounder gunsOne ammo cart
21/2
Bauman
Three 3-pounder gunsOne ammo cart
31/2
Sergeant
Two 6-pounder gunsOne ammo cart
21/2
Neil
Two 3-pounder gunsOne ammo cart
21/2
Hugg
Two 3-pounder gunsOne ammo cart
21/2
Moulder
Three 4-pounder gunsTwo ammo carts
31
[i] John Muller, A Treatise of Artillery the second edition (John Millan, Whitehall, London, 1768), 178.
[ii] John Greenwood, Revolutionary Services of John Greenwood of Boston and New York, 1775-1783, 40-41. “the first intimation I received of our going to fight was the firing of a 6- pound cannon at us, the ball from which struck the fore horse that was dragging our only piece of artillery a 3-pounder.” Retrieved from https://archive.org/details/revolutionaryser00gree/page/38/mode/2u
[iii] First author’s grandparents (paternal and maternal) farmed with horses in early 1900’s. Grandparent that farmed in Blue Ridge Mountain’s foothills and clay mud taught these expressions. The reader may find references to a horse pulling 1.5 times its weight on a road. That reference assumes roads with firm surfaces and includes, in its averaging of 1.5, roads with asphalt and concrete from more modern times.
[iv] Adrian B. Caruana, The Light 6-Pdr. Battalion Gun of 1776, (Alexandria Bay, NY: Museum Restoration Service, 1993), 14.
*Bios*
Karl G. Elsea graduated with a B.S. in Electrical Engineering from Va. Tech. and a MBA from UNCC. Son, daughter, and I participate in Revolutionary War reenactments. Have ridden horses most of my life. Was a coxswain in the U. S. Coast Guard and earned the Trident. Taught disadvantaged youth at a juvenile detention center. Own horses and pull a bronze four-pounder cannon and limber for living history.
William M. Welsch, a retired administrator at Montclair State University in New Jersey, is the current and founding president of the American Revolution Round Table of Richmond, and co-founder of the Congress of American Revolution Round Tables. He is a tour guide of Revolutionary War battlefields, frequent presenter and author of multiple articles on the Revolution. His interest areas include the Revolution in New Jersey, Pennsylvania and the generals of the Continental Army. Welsch served in the United States Marine Corps and is married with two daughters and five grandchildren.
Emerging Revolutionary War welcomes back guest historian Dan Welch.
It’s December 9, 1775. Not only was the future of the fledgling Patriot’s cause at stake, but the future of our yet-to-be created Supreme Court was as well.
Over the previous months, rebel forces in the area had been engaged with Lord Dunmore’s troops for control of military supplies in the colony of Virginia. This eventually led towards the area around Norfolk, where Dunmore’s forces had fortified a position opposite a river crossing that was strategic both militarily and economically. The position, south of Norfolk, at Great Bridge, was not uncontested. Just opposite Dunmore’s stockade, known as Fort Murray, on the other side of the river, rebel forces settled in, arriving on December 2.
Col. William Wofford, in command of the 2nd Virginia Regiment and about 100 men of the Culpeper Minutemen battalion, began entrenching their position opposite Fort Murray while more militia from surrounding Virginia counties and North Carolina marched towards their aid. As more men arrived, as well as several pieces of field artillery, Lord Dunmore grew wary. He believed his only course of action was to attack Wofford’s men and drive them from the field. The attack was set to begin by dawn’s early light on December 9, 1775.
Found in the ranks of Wofford’s command that morning as the battle opened was a father and son, Thomas and John Marshall. Thomas, a vestryman, High Sheriff, and a member of the House of Burgesses had brought his son with him into the patriot ranks from Fauquier County. By the time of the battle, Thomas, who had been active in the organizing and raising the Culpeper Minutemen, had been appointed its major. His son John, age 20, its first lieutenant.
John Marshall’s biographer later recounted the importance of this moment on the young nineteen-year-old, writing “The young soldier in this brief time saw a flash of the great truth that liberty can be made a reality and then possessed only by men who are strong, courageous, unselfish, and wise enough to act unitedly…He began to discern, though vaguely as yet, the supreme need of the organization of democracy.”
John Marshall went on to serve as the fourth Chief Justice of the United States Supreme Court in 1801. Marshall remained at the post for thirty-four years, and, during his tenure, the Marshall Court brought the role of the Supreme Court to the fore, issued more than 1,000 decisions, and set the precedent of handing down a single majority opinion. These accomplishments and influences are just some of many that Marshall had on the Court, the federal government, and American history. Today, on the 245th anniversary of the battle of Great Bridge, it’s interesting to pause, reflect, and wonder how very different the United States and the Supreme Court might have been had Colonel Wofford’s forces, among them John Marshall, been defeated that day at the “second Bunker’s Hill affair….”
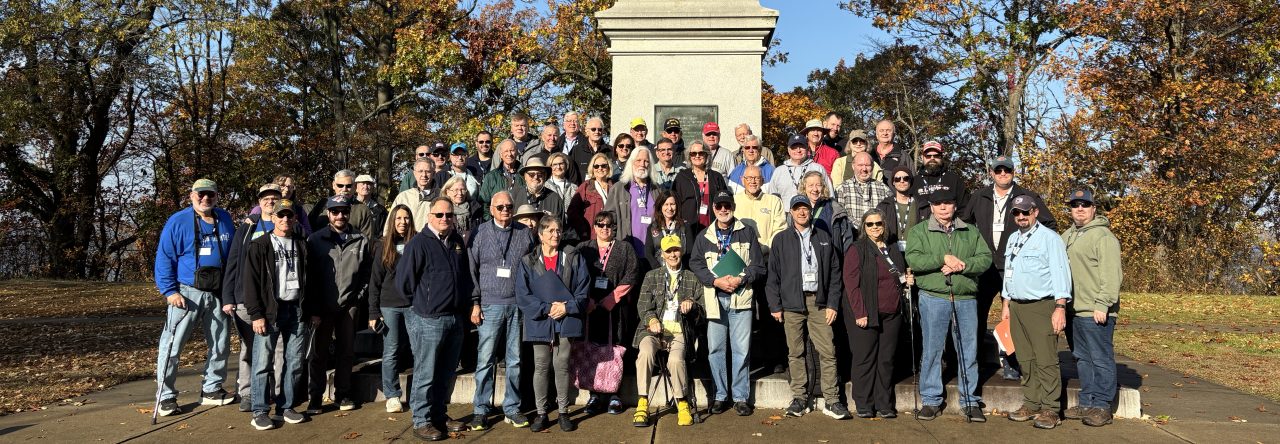
Pictures of Great Bridge Battlefield and monuments.