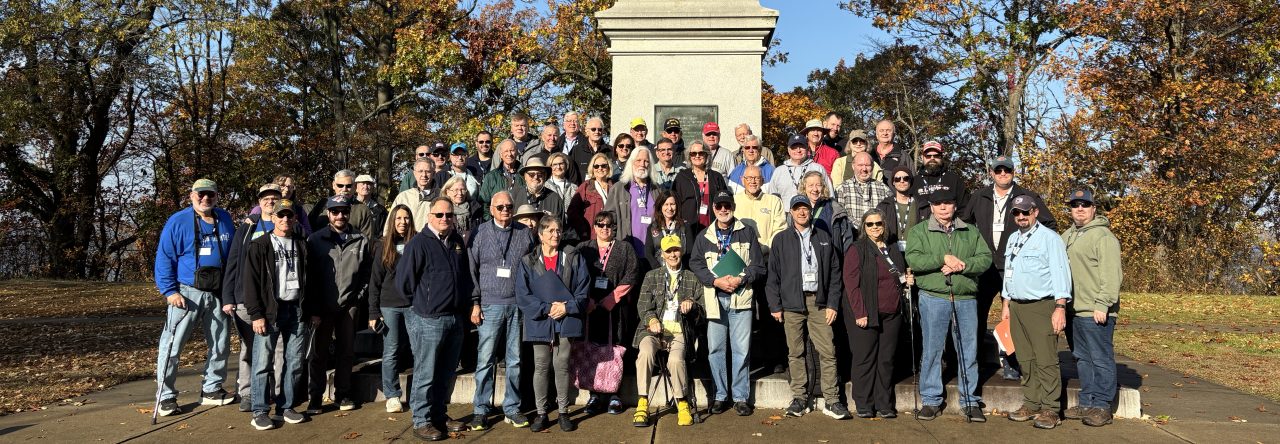
Emerging Revolutionary War welcomes back guest historian Avellina Balestri
As I have increased research and work on my American Revolution trilogy All Ye That Pass By, I have noticed a trend towards making this particular season between the anniversary of Nathan Hale’s hanging (September 22, 1776) and John Andre’s hanging (October 2, 1780) into a strange sort of macabre festival I have dubbed “Hangemtide.” I suppose one could consider it a sort of Halloween for historical enthusiasts, as the autumnal chill starts to creep into the air, greenery dies, and horror releases hit the market. But a strange pseudo-religious reality I have observed is a tendency to treat these hangings as secular passion plays of a kind, connected by a secular Advent calendar of daily memorials, with the overarching takeaway being a strange sense of catharsis for the salvation of a newborn nation.
As a Catholic, I very well know the thematic beats, and I can sense them in an unsettling way in these commemorations. We must have our scapegoat; a man, or two, must die so the nation might live in our origin myth. But though the narrative may comfortably place Hale as the first Christ-figure, it uncomfortably assures that Andre is the second. We as the audience, while intended to shed tears for the first, are meant to bay for the blood of the second. Perhaps we may pity him in passing moments, but never so much that we truly desire him to be spared. His death is a foregone conclusion of the ritual which must be affirmed. We are recalling the traditional readings on Passion Sunday, and hardly realize it. We have, perhaps, lost the much greater plot of Christianity, that in the death of each, the other perishes, and in every death, we partake, in the killing and the dying, and in every human catastrophe, there is planted the original Passion Tree, no less in the past than in the present. History is not safe from our iniquity, nor from grace breaking in upon it, oftentimes painfully.
Touching back upon the historical events being remembered according to our national needs, I have often gently chided friends involved in “Hangentide” that I am ever on call to be the defense lawyer Major Andre never got should they wish to shuttle me into the past on circuit. I do not intend to make that defense the core of my current thesis, but put simply, I believe that if he had received a proper legal defense, Andre may well have had his sentence reduced based on extenuating circumstances. But that was not to be, because it could not be, not in the narrative as it is presented to us over and over again. This was a necessary death; a payment to Justice itself. It is language used to mask what was essentially a revenge hanging for both Hale’s execution at the hands of Crown forces and Arnold’s betrayal of the revolution for hard cold coin. The true foundation stone of “Hangemtide” is a satisfaction we are meant to share in nearly 250-year-old retribution. It is meant to, in some way, bring the country together through our most primal tribal instinct. But does it?
Emerging Revolutionary War welcomes back Jeffrey Collin Wilford Part I, click here. Part II, click here.
Major Andre’s Reckoning
Along the way from Tarrytown, New York, to West Point, Benjamin Tallmadge conversed almost nonstop with the freshly captured British prisoner John André and learned much about the youthful officer. It was perhaps Major Tallmadge’s background as George Washington’s chief intelligence officer as well as recollections illuminated by the light of André’s charisma, that helped begin to paint a picture of an honorable soldier. After countless hours of conversation during their journey north he became convinced that André’s “Head was in fault, & not his heart.” Tallmadge commented later that André was “a most delectable Companion. It often drew tears from my Eyes to find him so pleasant & agreeable in Conversation on different Subjects, when I reflected on his future fate, & that too, as I believed, so near at hand—” In the short time the two spent together Tallmadge seemed to have grown extremely fond of the British Major.
One can sympathize with Tallmadge’s point of view. After all, André was merely another victim of the traitor Arnold. He had intended to meet him on board the Vulture but when Arnold failed to show he was forced to go ashore with Smith. After the Vulture was scared off by artillery and Arnold convinced him to don civilian clothes, plying him with incriminating materials and sending him through enemy territory, the stage was set. In his testimony, he said it was General “Clinton’s directions not to go within an Enemy post or to quit my own dress.“ Even so, by his own admission, it was the ruling of the military Proceedings that “he changed his Dress within our Lines and under a feigned Name and in a Disguished [sic].”
Perhaps Tallmadge’s sympathies toward André were accentuated by his hatred for Arnold. Tallmadge’s characterization of André becomes clearer in a simple personal act from his testimony when he stated that “André kept reviewing his shabby Dress, & finally remarked to me that he was positively ashamed to go to the Head Qrs of the American Army in such a plight. I called my Servant, & directed him to bring my Dragoon Cloak, which I presented to André. This he refused to take for some time, but I insisted on it, & he finally put it on & rode in it to Tappan.”
By the time they made Tappan, André was under heavy guard and imprisoned at Mabie’s Tavern. Just a few hundred feet away, Washington convened 14 of his top military officers who, over two days of testimony, found André guilty and sentenced him to death. On October 1st André personally requested from Washington the honor of a firing squad over a “gibbet.” Knowing the favor could not be granted, Washington opted to ignore the request.
On October 2nd, just before noon, André appeared on the stoop of Mabie’s Tavern. Four officers were present to escort the convicted spy to his final judgment. One of the four officers was Captain Lieutenant John Van Dyk, with just six months separating this moment from his own capture by the British off the coast of New Jersey. “There were about six steps which led into the stoop of the house, on the light of these, one American officer with myself were standing when Major André came out of the front door of the house in regimentals, hooking his arm with the two American officers (his attendants) one on his right and left. He ran down the steps of the stoop as quickly and lively as though no execution was to take place, and immediately fell into the centre of the guard, a place assigned him.”
André exits Mabie’s Tavern on the day of execution. (copyright: New York Public Library)
Escorting André with his four guards was also Major Benjamin Tallmadge. “I walked with him to the place of execution, and parted with him under the gallows, entirely overwhelmed with Grief, that so gallant an officer, & so accomplished a Gentleman should come to such an ignominious End.” Echoing that sentiment in writing nine days after his execution was Alexander Hamilton, saying “Never perhaps did any man suffer death with more justice, or deserve it less.”
Mabie’s Tavern today (Wilford)
When André had turned the corner to see the gallows before him, Van Dyk recorded his statement. “Gentlemen, I am disappointed, I expected my request…would have been granted.” According to Van Dyk, preparations were made and André’s final words when asked if he had any were “I have nothing more to say, gentlemen, but this, you all bear me witness, that I meet my fate as a brave man.” With that came the untimely end of Major John André who was then cut down and not allowed to fall to the ground and “every attention and respect was paid to Major André that it is possible to pay a man in his situation.” He was placed in a simple coffin and buried in a shallow grave close to the site. Over the following 40 years, a peach tree grew above the grave, ostensibly from a peach given to André by a woman as he marched to his execution.
When the Duke of York requested the return of his remains in 1821 it was not without fear of a backlash, specifically from the residents of Tappan. Many felt it was an affront to the memory of George Washington. British consul James Buchanan found that the protestations dissipated quickly after he agreed to buy those who were against the idea a drink at the local inn. The bones were then dug up with the root of the peach growing through the skull’s eye socket. They were placed in a mahogany ossuary and shipped by way of a British mail ship called a packet to New York City where they awaited their return to London.
Captain, now Colonel, John Van Dyk, 67 years old and working for the New York Customs House near the docks of the North (Hudson) River heard about the impending exhumation and, using his connections with influential New Yorker John Pintard, requested a dialog with Buchanan. Through the British consul, he obtained a penned introduction to the captain of the packet where André’s bones lay. Van Dyk made his way to the North River and found the captain just leaving to go back aboard the packet. Upon handing him the introduction from Buchanan, the captain requested that he return at 10 o’clock the following morning and a barge would be waiting to take him to the ship.
Coincidentally, that same day Dr. Valentine Mott, considered by many to be the greatest surgeon of his time, was treating one of Van Dyk’s children and heard of Van Dyk’s plan. Naturally, he was invited along for the next morning’s visit. That day, the two reached the docks just before 10 o’clock and met the barge which took them to the ship. “We went together on board the Packet. The bones were in a superb urn, and we were permitted to handle them. I mentioned the circumstances, as I have related them above, to the Captain [about André’s execution] — bid him goodbye, and we came on shore.” Van Dyk’s motivations for wanting to visit the remains of André are lost to history and probably best understood by those who experienced the emotions of that fateful day in American history.
Amidst a boat of mail destined for England, John André left New York for the last time, traveling back to London where his remains were repatriated. His ossuary was emptied of its contents and his remains were buried in Westminster Abbey with the inscription “universally beloved and esteemed by the Army in which he served, and lamented even by his foes, now lay alongside medieval kings, Renaissance statesmen, and Georgian poets.” Arnold and his wife Peggy lived the rest of their lives post-Revolution in London, reviled by most, and are buried just 3 miles away at St. Mary’s Church in Battersea, in a vault that sits behind a wall in a basement kindergarten classroom.
[Original source: The Papers of George Washington, Revolutionary War Series, vol. 28, 28 August–27 October 1780, edited by William M. Ferraro and Jeffrey L. Zvengrowski, 291–296. Charlottesville: University of Virginia Press, 2020.]
[Original source: The Papers of George Washington, Revolutionary War Series, vol. 28, 28 August–27 October 1780, edited by William M. Ferraro and Jeffrey L. Zvengrowski, 277–283. Charlottesville: University of Virginia Press, 2020.]
[Original source: The Papers of George Washington, Revolutionary War Series, vol. 22, 1 August–21 October 1779, edited by Benjamin L. Huggins, 745–746. Charlottesville: University of Virginia Press, 2013.]
[Original source: The Papers of George Washington, Revolutionary War Series, vol. 28, 28 August–27 October 1780, edited by William M. Ferraro and Jeffrey L. Zvengrowski, 303–311. Charlottesville: University of Virginia Press, 2020.]
Van Dyk, John. “Major André, Letter of Col. Van Dyk to John Pintard, August 27, 1821.” Historical Magazine 7, no. 8 (August 1863): 250-252.
Van Dyk, John. “Major André.” Martinsburg Gazette, August 20, 1835.
Emerging Revolutionary War welcomes back Jeffrey Collin Wilford For Part I, click here.
General Benedict Arnold’s Betrayal
On the morning of September 21, 1780, while Captain John Van Dyk, only recently freed from the prison ship Jersey, was guarding West Point as part of Colonel John Lamb’s artillery unit, the HMS Vulture arrived at Haverstraw Bay and anchored just off Teller’s Point. Two men pressing apples at a cider mill on the shore became alarmed at the presence of a British warship on the river north of the “neutral ground,” and a barge disembarking from it filled with Redcoats. Not knowing their intent, both decided to take matters into their own hands and opened fire on the soldiers. John “Rifle Jack” Peterson, a veteran of the Battle of Saratoga, received his nickname due to his superior marksmanship. The other, Moses Sherwood was just 19 years old and a friend of Jack Peterson. Both were enlisted in the Westchester County militia. Their relationship was very close as Rifle Jack had held Sherwood’s father in his arms as he died at Saratoga three years earlier.
Croton (Teller’s) Point today – (Wilford)
Several of their shots hit their mark, wounding soldiers and prompting the barge to return to the Vulture which opened fire with a barrage of grapeshot on the two men as they crouched behind rocks. This signaled to the pair that the ship was within cannon range and they quickly made their way in the darkness to Fort Lafayette ten miles to the north to secure a cannon from the officer in charge, Colonel James Livingston.
Cannon that fired on the Vulture Peekskill Museum (Wilford)
At Peterson and Sherwood worked with several other soldiers to lug the 4-pounder back to the point while, unbeknownst to them, André slipped away from the Vulture. He made his way from the Vulture to shore, at around midnight, with Loyalist Joshua Hett Smith who had been instructed to gather him from the ship. His destination was a clandestine meeting on the river bank with American General Benedict Arnold, the famous war hero of Saratoga who had been plotting for months to turn against the cause of American independence. What was clear, by André’s account, was that this meeting was to be a fairly quick round-trip between the Vulture and shore under cover of darkness.
Instead, an unraveling of the circumstances dictated that he shed all previous warnings from British General Sir Henry Clinton to stay dressed in his regimental uniform, avoid enemy checkpoints, and not possess any incriminating papers. André admitted this to Clinton in a letter written after his capture and dated September 29, 1780 stating, “The Events of coming within an Enemys posts and of Changing my dress which led me to my present Situation were contrary to my own Intentions as they were to your Orders.” This would force him to become, in his own words, “involuntarily an impostor.”
As negotiations on the riverbank dragged on, likely due to Arnold’s negotiations around rank and compensation, daybreak drew near. Fearing discovery, and clearly against André’s original plan, they moved their talks to the home of Smith, which overlooked the river and the Vulture at anchor. During the meeting at Smith’s house, Arnold eventually handed over the defensive plans of the Continental Army’s citadel, West Point, and the minutes from General George Washington’s September 6th War Council meeting that created a vulnerability for the Americans that could have proved catastrophic.
It is easy to understand why West Point was so significant to the British. It was crucial, not just as a military installation situated on the banks of the Hudson between New England and the Southern Colonies, but as a symbol of American strength and resolve. Perched on the high ground overlooking the Hudson, West Point had been there to thwart British attempts to dominate the 300-mile-long river which would have allowed them to effectively cut off the rebels of New England from the rest of the colonies. Losing West Point would have taken an important strategic foothold away from the Americans. The potential of losing General Washington in the process would have also dealt a severely damaging blow to the American cause, if not ending the war altogether.
While the Arnold and André negotiations were taking place, a contingent of men, along with Peterson and Sherwood, had dragged the 4-pounder to Teller’s Point into position on the riverbank within range of the Vulture.
Early in the morning, awakened by cannon fire, the conspirators at Smith’s house could see the Americans in the distance opening fire on the ship. Though he did not immediately know it, this would permanently separate André from his only means of a safe escape. Hit several times and stranded in the middle of the Hudson by a slack tide and unfavorable winds, the Vulture endured the cannon fire but eventually cut her cables to drift with the currents south to Dobbs Ferry.
As a result of the retreat of the Vulture, an alternative plan was devised to get André back to the British lines. On the morning of the 22nd, in disguise and with a pass written by Arnold to travel unmolested behind American lines under the alias John Anderson, he and Smith began the overland trek back to British-occupied New York City. Arnold returned to his home at West Point. What was clear from André’s later testimony was that he felt like this change of plan made him a victim of circumstance saying he “thought it was settled that in the way I came I was also to return.”
What were the motivations for the thirty-nine-year-old hero of Saratoga, who had risen through the military ranks to become one of Washington’s most effective field generals, to give up not only West Point, but his reputation in history? Much has been written, but what is known is that he had been living a life well beyond his means. His wife Peggy Shippen, half his age and from a prominent Philadelphia Loyalist merchant family, had a taste for luxury. To woo the 19-year-old, Arnold openly lived a life of excess while in Philadelphia which turned more than a few heads, wondering if he had secretly been trading with the British.
Benedict Arnold was also known for his self-assured nature and temper. Infighting within certain circles of the military, and his discovery that several junior officers had received promotions ahead of him, provided him even more motivation to turn. Arnold felt the military did not display the respect that was due a war hero and this sentiment was on display in a letter to Washington on May 5, 1779. “Having made every sacrifice of fortune and blood, and become a cripple in the service of my country, I little expected to meet the ungrateful returns I have received of my countrymen.” Perhaps the influence placed upon him by his relationship with Peggy due to her father’s position, and his criticism of the American cause added more weight to his self-imposed need to betray his country. Consequently, he began to develop a plan to turn over West Point to British General Sir Henry Clinton, with Major John André as the British intermediary.
The second day treading enemy soil was rather uneventful as André and Smith carefully made their way south to the original King’s Ferry which crossed the Hudson between Stony Point and Verplanck, the site of the former Fort Lafayette. The crossing was a nerve-wracking affair for André as this was the main ferry crossing for all Continental troops and supplies just outside of the watchful eye of the British forces in New York City 45 miles to the south. Following the Crom-Pond Road, the journey was slow and deliberate, befitting a spy and his Loyalist guide. As nightfall approached, they bedded down at a farmhouse before continuing their journey early the next morning.
Isaac Underhill House – Where André ate his last breakfast (Wilford)
The pair continued to make their way along the Croton River until reaching the southernmost lines of the Continental Army where Smith left André just after finishing their breakfast at the Isaac Underhill house. By the time André had reached Tarrytown, New York, by way of the Albany Post Road, a road he had been told to avoid, his luck had run out. Isaac Underhill House – Where André ate his last breakfast (Wilford)
At 9 o’clock on the morning of September 23, 1780, André was stopped by three militiamen at Clark’s Kill, a stream that today marks the boundary between Sleepy Hollow and Tarrytown, New York. According to André, he “was taken by three Volunteers who not Satisfied with my pass riffled me and finding papers Made me a prisoner.” Isaac Van Wart, John Paulding, and David Williams would go on to be considered heroes by most, but certainly not by all. One of their leading detractors was the person George Washington entrusted with returning André to West Point and ultimately Tappan for trial, Major Benjamin Tallmadge. Tallmadge was Washington’s chief intelligence officer and he believed the three militiamen were “of that class of person who passed between both armies.” He felt they lacked the very character he would end up heaping upon André.
André Capture Site (Wilford)
While the circumstances surrounding Major John André’s capture unfolded in Tarrytown, General Arnold, aware that his treacherous plot had been uncovered, and leaving behind his baby and a hysterically distraught Peggy Shippen, raced to avoid capture and meet up with the HMS Vulture. Upon his return from a meeting with French General Rochambeau at Hartford Connecticut, Washington, unaware of any involvement by Shippen, allowed her to return to her family in Philadelphia, perhaps letting go of an important bargaining chip in the process. It would later be learned that she might have been complicit in her husband’s treason. While she openly denied it, an admission from Theodosia Burr, Aaron Burr’s wife, that she admitted to her involvement as well as a £500 annual pension from King George III would suggest this.
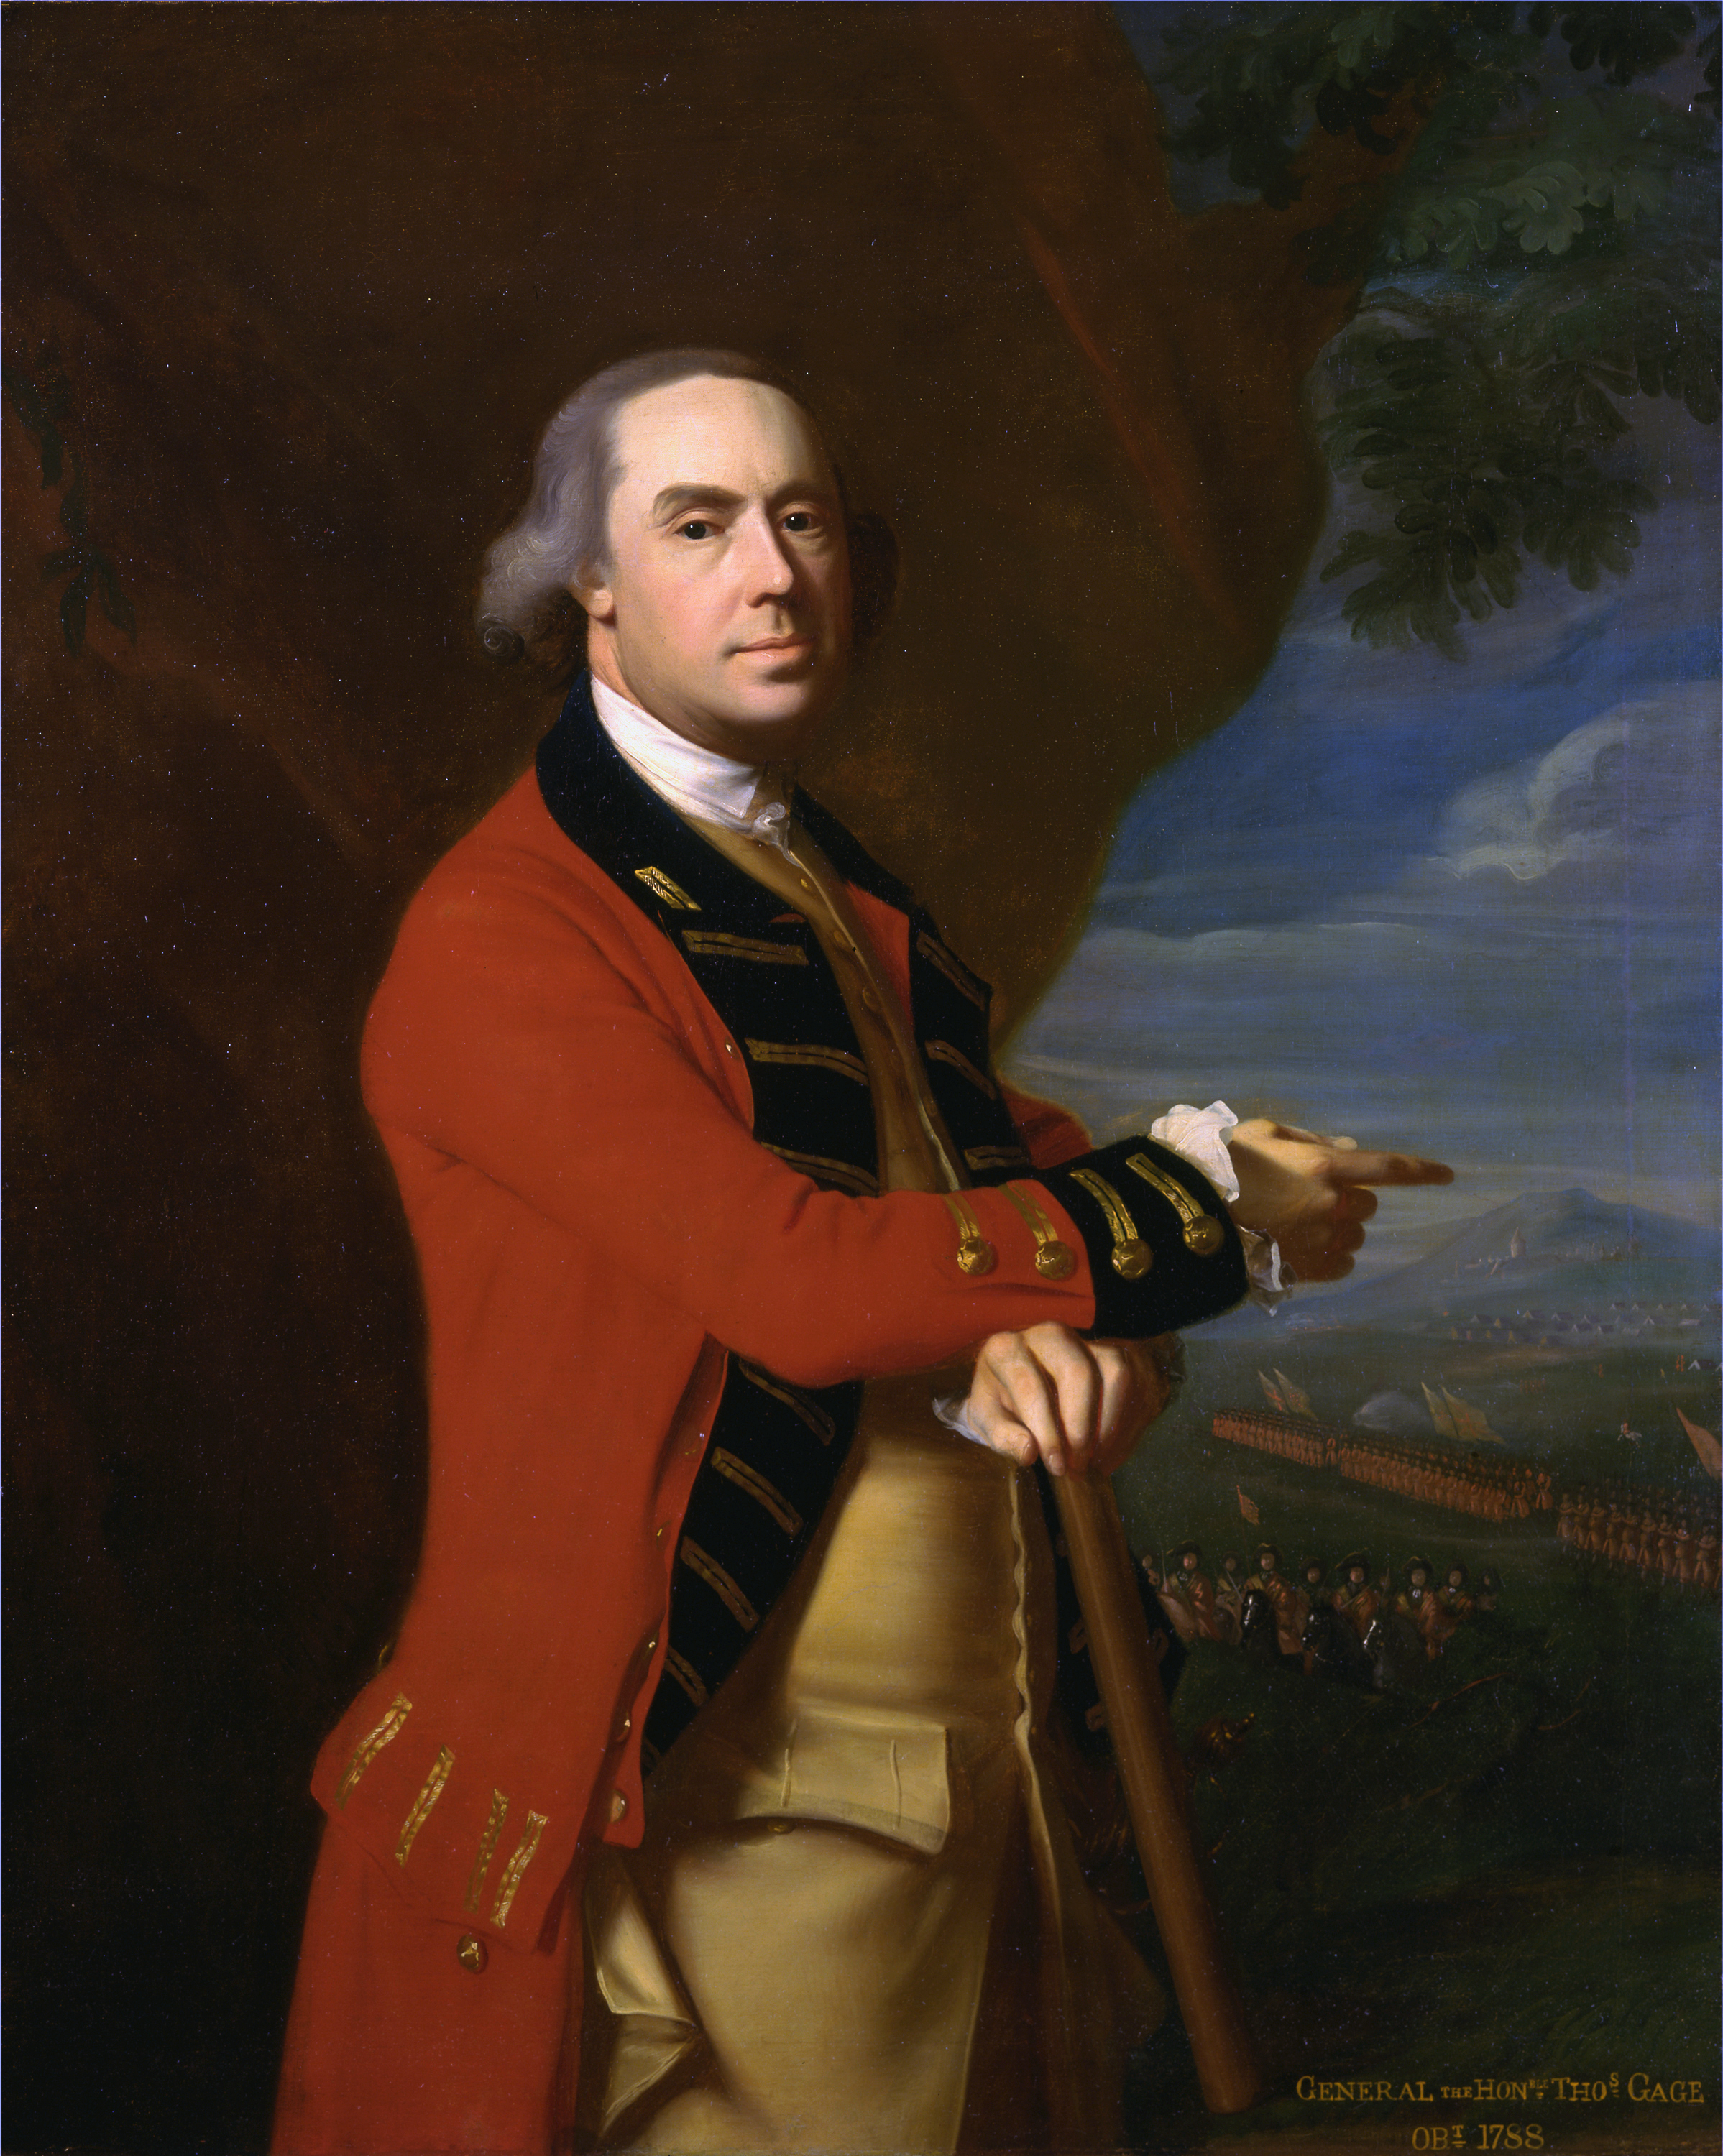
After years of political unrest between Great Britain and her North American colonies, tension finally boiled over into armed conflict on April 19, 1775, at Lexington and Concord. The British expedition to capture arms and munitions held by the colonists at Concord disintegrated into a panic-ridden retreat to Boston as local militias struck the column as it moved through the Massachusetts countryside. As often happens in war, seeds planted during a battle often sow the next.
Rather than enter march through Boston Neck British officers diverted to Cambridge and proceeded to the Charlestown Peninsula. Bordered by the Charles and Mystic Rivers, the peninsula jutted out into Boston Harbor northeast of the city. As darkness settled in, exhausted British soldiers made their way onto 110-foot high Bunker Hill. This eminence, commanded Charlestown Neck, a narrow sliver of land connecting to the mainland, along with the surrounding landscape.
That night, Lt. Gen. Thomas Gage, the British Commander-in-Chief met with Vice Admiral Samuel Graves, head of the North Atlantic Squadron. Among other suggestions, Graves urged Gage to burn Charlestown and occupy Bunker Hill. Graves likely knew that his ships in the harbor could not elevate their artillery to reach the high ground. Additionally, Bunker Hill was out of range of the Copp’s Hill Battery located in the city’s North End.
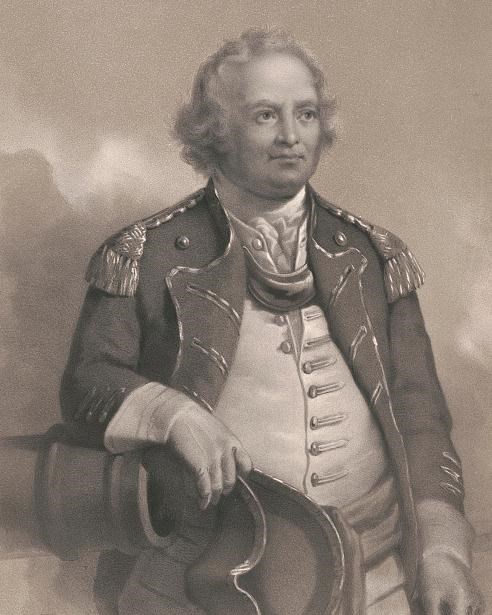
Thomas Gage
Gage recognized the long-simmering pot would eventually boil over with the colonists. “If you think ten thousand men sufficient, send twenty; if one million thought enough, give two; you save both blood and treasure in the end,” he wrote the previous fall to his superiors in London. Now, seemingly distant from the tactical situation on the ground, the survivor of the Monogahela rejected Graves’ proposal, claiming “the weakness of the army.” One must wonder if this was a decision Gage came to privately regret.
The arrival of reinforcements at the end of May, along with Maj. Gens. John Burgoyne, Henry Clinton, and William Howe may have buoyed Gage’s spirits. He soon began making plans to break out of Boston. In consultation with his subordinates, Gage formulated a plan to strike first across Boston Neck to capture Dorchester Heights, which commanded the southern end of the city. A second attack would capture Charlestown then move the three miles to Cambridge to hopefully destroy the Massachusetts army. The offensive was slated to take place on June 18.
Unfortunately, Boston leaked like a sieve and Gage failed to maintain what is known today as operational security. His plans were soon known in Cambridge where the Massachusetts Committee of Safety authorized their own effort to occupy Bunker Hill ahead of the British. On the night of June 16, colonial units led by Col. William Prescott marched out of Cambridge toward Charlestown. Rather than follow his orders, Prescott moved to the 60 foot high Breed’s Hill, located slightly to the southeast of Bunker Hill. Prescott’s decision remains one of the great mysteries surrounding the battle. His men began construction of a redoubt.
Another question surrounding the engagement rests with Henry Clinton. Sometime on the evening of June 16, Clinton wrote he conducted a reconnaissance and claimed he witnessed Provincial activity. He did not, however, explain where he went nor reported the type of actions he saw. Additionally, visibility would be difficult in the growing dusk. Clinton further stated he reported his findings to Gage and Howe but Gage elected to wait for daylight.
Sunrise revealed Prescott’s men atop Breed’s Hill, hard at work on the redoubt, which threatened the northern end of the city. Gage and his officers quickly convened at his headquarters at the Province House. Howe, the senior officer, would be in command. Some thought was given to sail up the Mystic to land on Charlestown Neck well in the rear of the redoubt. This plan was quickly nixed for fear the force could be isolated and cut off by reinforcements from Cambridge and militia on Breed’s Hill. It was eventually decided Howe would land below and out of range of the redoubt. Orders soon went out for the mustering of the “ten oldest companies” the flank and grenadiers, each – along with several regiments to prepare for the operation.
Each British regiment consisted of ten companies, eight line, with two flank and grenadier companies. The flank companies consisted of men who were often the shortest and fastest, who could operate in open order tactics, moving quickly to engage and skirmish with the enemy. The grenadiers, identified by their bear skin hats, were often the tallest men in the regiment and were used as the shock troops during an attack. By the time of the American Revolution, they were no longer carrying hand grenades but the name remained. Oftentimes these companies were separated from their regiments and placed in their own battalions.
Howe disembarked from Long Wharf, going over himself in the second wave, that afternoon. The British landed at Moulton’s Hill, near the modern Navy Yard. Stepping ashore, Howe observed his objective. “On first view it was clearly seen that the rebels were in forced and strongly entrenched upon their right in the Redoubt that had been seen from the town at daybreak,” he reported. “Their left and center were covered by a breastwork which reached from the Redoubt to the Mystick, the space from the Redoubt to that river being about 380 yards, and the whole extent they occupied about 600 yards”. The extent of the defenses compelled Howe to call for reinforcements.
Toward the middle of the day, the British launched their assault. Although Howe’s second in command, Brig. Gen. Robert Pigot was present and directed the left of the line, Howe also decided to take a stronger role and led the center himself on foot. Howe directed his light infantry to advance along the beach of the Mystic, likely with the hope in mind of getting behind the redoubt. This attack was met and repulsed by New Hampshire militia under Col. John Stark. So too were Howe’s and Pigot’s attacks. Watching his men come stumbling back after the failed attempt prompted Howe to later write “it was a moment I had not felt before.”
In the second assault, Howe attempted to further squeeze off the redoubt, pulling the light infantry from the beach to augment his center. At the same time, Pigot sent the 1st Marine Battalion and the 47th Regiment of Foot to get between Charlestown and the redoubt. During the assault, which also failed, the light infantry fired into the rear of the grenadiers, inflicting casualties.
Once again, the British lurched forward, determined to overwhelm the redoubt by a sheer force of numbers. This time, luck was with them as the militia were running out of ammunition. Francis, Lord Rawdon, an officer in the 5th Regiment of Foot who would go on to distinguish himself in the Southern Campaigns recalled “our men grew impatient, and all crying Push on, Push on, advanced with infinite spirit to attack the work with their small arms. As soon as the rebels perceived this, they rose up and poured in so heavy a fire upon us that the oldest officers say they never saw a sharper action. They kept up this fire until we were within ten yards of them…there are few instances of regular troops defending a redoubt till the enemy were in the very ditch of it.”
The British infantry swarmed into Prescott’s redoubt. Somewhere in the maelstrom was British lieutenant and adjutant of the 1st Marines, John Waller. “Nothing could be more shocking than the carnage that followed the storming of this work,” he wrote “We tumbled over the dead to get at the living who were crowding out of the gorge of the redoubt…’twas streaming with blood and strewed with the dead and dying men, the soldiers stabbing some and dashing out the brains of the others.” The colonials managed to retreat across Charlestown Neck, the British too exhausted to give chase.
Bunker Hill became the first of many pyrrhic victories for the British over the course of the American Revolution. Still, there were a number of shortcomings. Howe, rather than oversee the attacks from Moulton’s Hill, led the assaults himself. Perhaps he needed to inspire his men or he recognized the importance of the situation but he reverted to being a battalion commander. One must wonder whether the initial attacks could have been more effective had he delegated authority and used more of a guiding hand. Howe’s experience that day may have influenced him for the remainder of the war. Rather than rely on frontal assaults, he utilized flanking maneuvers such as those at Long Island and Brandywine. The friendly fire casualties can be attributed to inexperience amongst the ranks. Gage, along with his subordinates also share, the blame for not maintaining operational security and letting their plans slip out of Boston. Additionally, Gage failed to heed the advice of Graves and secure Charlestown Peninsula in April when he had the opportunity. The result nearly two months to the day resulted in over 1,000 British soldiers killed and wounded, a high cost of blood and treasure, in a war that would lead to the independence of the United States.
Emerging Revolutionary War welcomes guest historian Riley Sullivan, Professor of History at San Jacinto College in Houston, Texas.
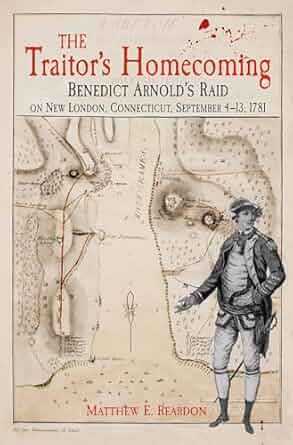
While many might be familiar with famed engagements at places like Bunker Hill, Saratoga, and Yorktown during the Revolutionary War, few are familiar with the actions that took place near New London, Connecticut in September of 1781. However, for the people of Connecticut, the battles that took place near Groton Heights and New London have been immortalized as a campaign highlighted by treachery and massacre. Largely, this interpretation has been adopted due to the commander of the British forces who engaged in this raid, Benedict Arnold.
Perhaps no other name in American History brings about more scorn than that of Benedict Arnold. Having defected to the British cause late in the Revolutionary War, for Americans at the time–and even today–he is viewed as a modern day Judas. However, with such infamy ultimately comes much misinterpretation of this historical figure and the events he was involved in. In Matthew E. Reardon’s recent study The Traitor’s Homecoming, he attempts to undo much of this misinterpretation. Drawing on previously unused primary sources, Reardon constructs an engaging argument that challenges the traditional view of Arnold’s conduct in the New London raid.
To construct this narrative of the New London raid, Reardon attempts to place into context the setting of the New London raid. By this stage in the war, the conflict in New York had been a state of stalemate for the previous few years. However, with Generals Washington and Rochambeu’s combined Franco-American forces on the move, the British commander in the region, Henry Clinton—informed by faulty intelligence as Reardon demonstrated—was convinced that an attack on New York was imminent. As a result, to divert Washington’s attention away from a possible attack on New York, Clinton authorized Arnold to lead a contingent of British troops to attack the vulnerable Connecticut coastline.
New London made the ideal target for a British raid as it had been a hotbed for commerce and privateering for the Patriot cause. To conduct such a raid, Clinton turned to Arnold as he was both a native of Connecticut and familiar with the New London area. Largely only being contested by militia behind a number of forts that guarded approaches to both the town and the Thames River, Arnold’s combined force of Loyalists, Hessian Jaegers, and British regulars made quick work of the Patriot militia throughout the campaign. Even with New London in their hands, outside events–notably Clinton’s realization that Washington was moving on Cornwallis at Yorktown–led to Arnold having to relinquish his gains. However, with the high casualties suffered by both sides during the raid, coupled with the burning of much of the town, the events “cemented Benedict Arnold’s reputation for villainy.” (x)
When considering the traditional interpretation of Arnold’s raid on New London, Reardon makes it clear throughout his work that a “distorted interpretation” of the events had emerged (ix). From veterans to the Groton Battle Monument at Fort Griswold Battlefield State Park, the events that took place in Connecticut in 1781 have been enshrined as a massacre of Connecticut militia at the hands of Arnold. However, when looking at contemporary letters, diaries, and later pension records, Reardon demonstrates that there are some noticeable gaps within the traditional account of this campaign. In particular, when examining the death of Colonel William Ledyard–who was alleged to have been killed while attempting to surrender–Reardon concluded that through these sources, the traditional accounts accepted proved to be inconsistent with contemporary accounts of the campaign.
But, even with these inconsistencies, this is not to say that the fighting at Fort Griswold and the subsequent burning of New London was less than brutal. Reardon wrote that “the immediate reaction of the community was shock” and that “for many it was beyond comprehension.” (339) To no surprise, this sheer shock of the fighting coupled with Arnold’s involvement led to this distorted narrative of the campaign.
Through the examination of contemporary letters, diaries, and later pension applications, Reardon is able to reconstruct in great detail the events of Arnold’s New London raid and offer an unbiased narrative. By providing these fresh sources in The Traitor’s Homecoming, Reardon effectively builds on the existing literature of the subject and demonstrates how public perception can lead to the misinterpretation of historical events like that of the New London raid.
Details:
Matthew E. Reardon, The Traitor’s Homecoming: Benedict Arnold’s Raid on New London, Connecticut, September 4-13, 1781. Published by: Savas Beatie LLC. Summer 2024. 448 Pages.
*Check out Emerging Revolutionary War’s YouTube page as well for a “Rev War Revelry” interview with author Matthew E. Reardon.*
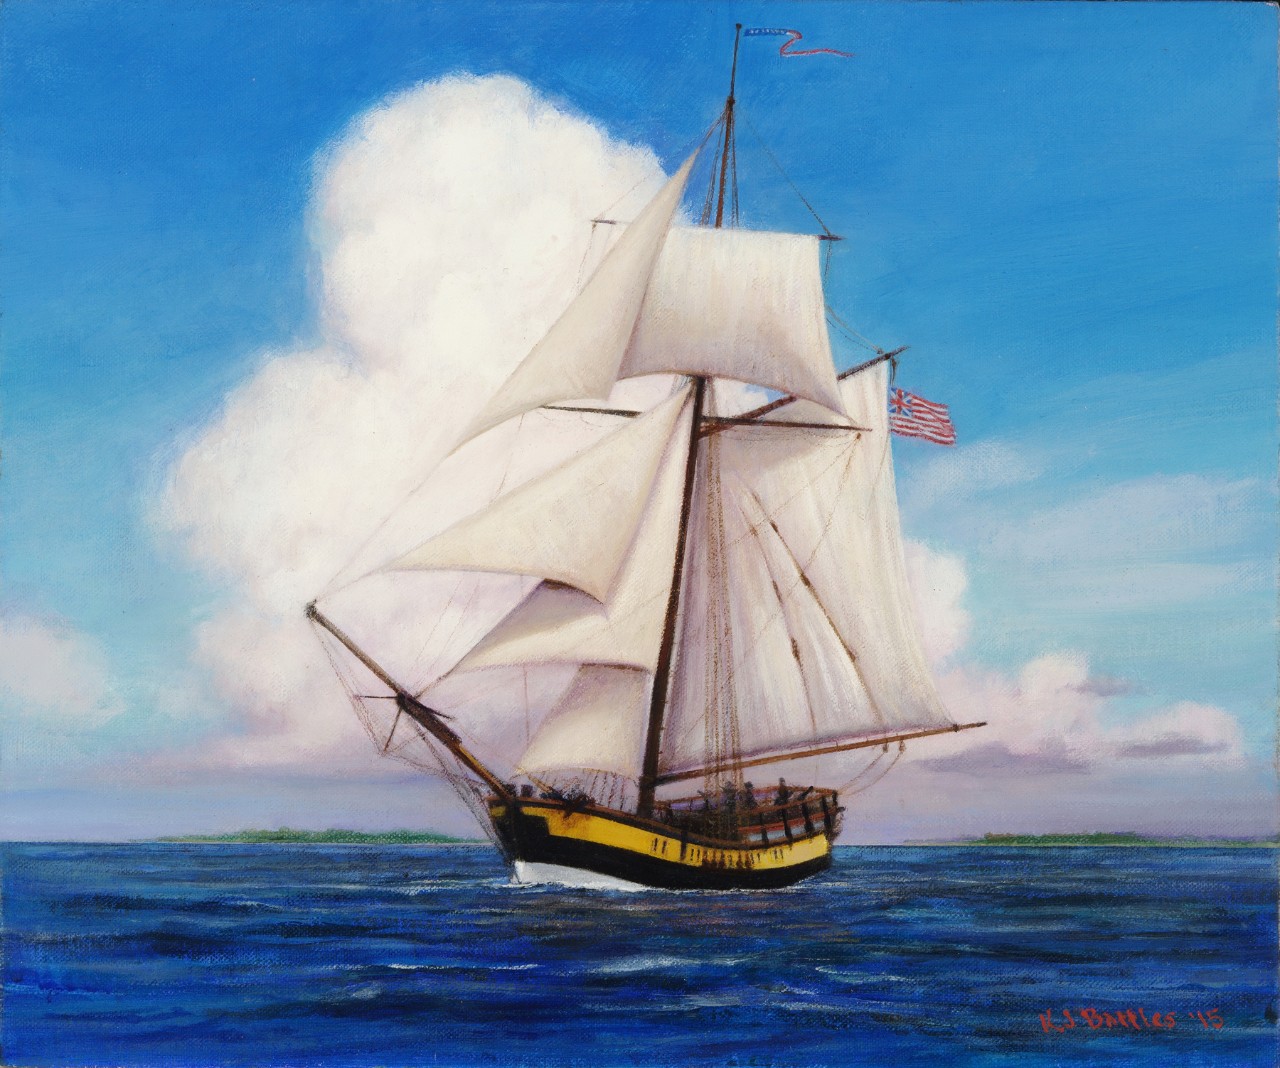
Katy in her later service as the Continental Navy ship Providence. “Sloop Providence under Sail by Kristopher Battles” (Naval History and Heritage Command)
Since his brief visit in November 1774 and his longer term stay commencing in December, Captain James Wallace of the British ship Rose (20 guns), had patrolled Narragansett Bay to enforce the Coercive Acts and prevent Britain’s rebellious colonies from importing gunpowder and armaments. Loyalists had taken heart and rebels had been frustrated with his presence. Not only were his patrols interfering with local commerce by seizing ships and their cargos—his main mission—but he created a more visible symbol of Britain’s ability and willingness to force its colonists to comply with Parliament’s laws.
One of the loyalists encouraged by the Royal Navy presence in Narragansett Bay was a Newport merchant named George Rome. Wallace had visited Rome and was dining with him when a breathless messenger warned the captain that a mob was out to tar and feather him back in December, 1774. In the moment, nothing came of it, but Governor Joseph Wanton warned Wallace that the town was not safe for British officers, sailors, or loyal subjects. Things remained at a low simmer that winter and spring, including the initial weeks after the Lexington and Concord. Tensions, however, could not help but rise. Diarist Ezra Stiles, recorded on May 23 that some 90 Rhode Island soldiers under the command of Captains [John] Topham and [Thomas] Tew marched from the Newport courthouse and through town beating up volunteers to join the nascent American Army. Wallace was dining in town that day and no doubt heard the racket.[1] Stiles wrote, “The Tories were greatly mortified to see the daring Boldness of the Rebels as they called them. The Tories had said that the Men o’War would fire the To[wn] if any Soldiers were raised in it. But there was no Molestation.” From Stiles’ version of events, the march appears as nothing less than a provocation to determine whether the rumored threat of Wallace and his ships to Newport proper was a bluff. The lack of an immediate response may have demonstrated that it was. In truth, a significant portion of Newport’s population opposed the rebels and voluntarily supplied Wallace and contracted for grain to provide to the British army.
Following the initial skirmishes at Lexington and Concord on April 19, 1775, colonial militias from throughout New England converged around Boston, with the area of Cambridge and Roxbury serving as the epicenters of the camps. These New England militia effectively layed siege to the city where British General Thomas Gage concentrated after April 19th. The British, cut off from the countryside, relied heavily on supplies brought in by sea. At the same time, American forces were eager to secure resources and deny the British any additional supplies from nearby coastal areas.
The location of the HMS Diana is marked with “16” on the map
One such resource-rich area was Noddle’s Island and Hog Island both located in Boston Harbor. These islands contained valuable livestock and hay, which the British had been attempting to secure to feed their troops and horses. American intelligence reported that the British were planning to remove these resources, prompting a proactive operation by the colonial forces to beat them to it.
In early May, Dr. Joseph Warren led a group inspecting the islands and recognized their imporance. As part of the Massachusetts Committee of Safety, Warren led the effort for a reslolution to be passed to either capture or destroy the supplies on the islands. On May 14th, the Committee stated “Resolved, as their opinion, that all the live stock be taken from Noddle’s Island and Hog Island, and from that part of Chelsea near the sea coast, and be driven back; and that the execution of this business be committed to the selectmen of the towns of Medford, Malden, Chelsea, and Lynn, and that they be supplied with such a number of men, as they shall need, from the regiments now at Medford.” Soon the commander of the New England army around Boston, General Artemas Ward, put a plan in motion to quickly strike both islands.
The American expedition was led by Colonel John Stark and Colonel Israel Putnam, both future generals in the Continental Army. The colonial forces, primarily composed of New Hampshire and Massachusetts militias, planned a nighttime amphibious raid to remove the livestock and destroy hay supplies that might benefit the British. On the night of May 27, colonial forces quietly moved onto Hog Island and began driving off livestock and burning haystacks. British forces, stationed in Boston and alerted to the colonial activity, responded by dispatching marines and the British schooner HMS Diana, a lightly armed but maneuverable vessel well-suited for operations in the shallow waters of the harbor.
As the colonists worked to transport livestock to the mainland, they encountered resistance from British marines who had landed on Noddle’s Island and began advancing toward their position. A sharp skirmish ensued, during which the American militia used the terrain to their advantage, fighting from behind trees, stone walls, and other natural cover. The colonial forces managed to repel the British marines, inflicting casualties and forcing a retreat.
Lieutenant Thomas Graves (nephew of Vice Admiral Samuel Graves) commander of the HMS Diana. Shown in his rear admiral uniform in ca. 1801. Often confused with Lord Thomas Graves, British commander during the Battle of the Capes
The turning point of the engagement came with the involvement of the HMS Diana. The schooner attempted to support the marines by moving up the narrow Chelsea Creek to engage the colonial militia and cut off their withdrawal. However, as the tide receded and the ship ventured too far inland, it became grounded in the shallow, muddy waters.
Seeing an opportunity, the colonists brought up field artillery from shore and opened fire on the stranded vessel. Over the course of the battle, they subjected the Diana to intense musket and cannon fire. Unable to refloat the ship due to the falling tide and increasing colonial pressure, the British crew was forced to abandon it. American forces quickly boarded the vessel, stripped it of usable supplies, weaponry and its 76 foot mast, and then set it ablaze, destroying the schooner completely.
The Battle of Chelsea Creek resulted in a clear American victory, both strategically and psychologically. The destruction of the HMS Diana marked the first loss of a Royal Navy vessel in the Revolutionary War, dealing a symbolic blow to British morale. For the colonists, it was a tangible demonstration of their ability to challenge British authority not only on land but at sea.
Major General Israel Putnam said after the fight on Chelsea Creek “I wish we could have something of this kind to do every day,”
Tactically, the victory helped to solidify American control of the Boston-area islands and limited the British army’s ability to forage for supplies. This contributed to the worsening conditions inside besieged Boston and increased pressure on General Gage. The morale boost for the colonial militias was significant; it reinforced the notion that British troops and naval forces were not invincible and that well-coordinated militia operations could succeed.
In addition, the battle was notable for showcasing early instances of American military ingenuity and leadership. Figures like Israel Putnam and John Stark went on to distinguish themselves in later battles, and the ability of the militia to effectively coordinate a land-sea operation foreshadowed the more sophisticated tactics that would develop over the course of the war. A few months later on August 1st, the mast of the HMS Diana was raised on Prospect Hill as a liberty pole. A symbol that was seen by not just the Americans around Cambridge but also the British in Boston. This location was also where legend states that George Washington ordered the first American flag, the Grand Union, to be raised on January 1, 1776.
While over shadowed by Lexington, Concord, or Bunker Hill, the Battle of Chelsea Creek played a crucial role in the early war. It helped secure the outer perimeter of the Siege of Boston, denied the British critical supplies, and emboldened the colonial cause at a time when confidence was still fragile. The success of the operation, including the destruction of the Diana, offered a dramatic image of colonial resistance and ingenuity that resonated beyond New England.
Today, the location of Noddle’s and Hog Island are gone. Nineteenth century and modern infill has completely reshaped the area from mudflats and tidal marshes to buildable land. Modern day East Boston, Winthrop and Logan Airport cover the area. The community of Somerville contines to commemorate the raising of the Grand Union flag on January 1 Diana‘s mast with a flag raising ceremony. Though mostly forgotten, the fighting along Chelsea Creek continued to embolden men like Joseph Warren and Israel Putnam and encourage their agressiveness a few weeks later on the Charlestown peninsula.
Emerging Revolutionary War welcomes historian and educator Jeffrey Collin Wilford to theblog. A brief biog is at the bottom of this post. A list of sources will be at the bottom of the concluding Part III.
Major John André and John Van Dyk: Continental Artillery Soldier
Much has been written about the betrayal of America by Benedict Arnold. However, one small but candidly morbid fact buried in the story has not. It relates to the disposition of British Major John André’s remains as they lay in a wooden ossuary on a British mail ship on the banks of the Hudson River while awaiting their return to England in 1821. The only recorded recollection of this event was in a letter written by a 67-year-old former Revolutionary War soldier and published in a Virginia newspaper in 1825. This man also happened to be one of the four officers who escorted André to the gallows in Tappan, New York, on October 2, 1780.
John Van Dyk lived a storied life, serving America as a militiaman, Continental Artillery soldier, customs officer, New York City assessor, and assistant alderman. He came from an old Dutch family that had settled in the original New Amsterdam colony, which would eventually become Manhattan. There is ample evidence that, in 1775, he was actively involved in significant acts of disobedience against British rule with other “Liberty Boys,” as the New York Sons of Liberty preferred to call themselves.
One of these acts was stealing muskets and cannons from the Royal Armory and Fort George. Under the encouragement of Isaac Sears and Marinus Willett, he was one of a crowd of colonists who broke into the Royal Arsenal at City Hall on April 23, 1775, stealing 550 muskets, bayonets, and related munitions. The angry mob had been spurred to act by the attacks on their fellow countrymen the week previous at Lexington and Concord in Massachusetts. Every person who took a musket was required to sign for it, signaling a promise to return it if it was needed to fight against British occupation. That call came on July 4, 1775, when the New York Provincial Congress ordered them recalled to outfit newly commissioned Colonel Alexander McDougall’s 1st New York Regiment. It was relayed that anyone who refused would be deemed an enemy of the state. In all, 434 muskets were returned.
Exactly four months later, Captain John Van Dyk was one of sixty or so men who, under Liberty Boys Colonel John Lasher and Colonel John Lamb, executed the orders of the New York Provincial Congress to remove the cannon from Fort George at the southern tip of Manhattan and drag them back to the area of City Hall. With tensions high in the city, the state leaders feared they would be turned against the colonists if they were left in the hands of the British. One of the militia members assisting in the removal effort was 19-year-old King’s College student Alexander Hamilton of the Hearts of Oak independent militia. By this time, civil unrest had relegated the British colonial government to operating from naval ships anchored in New York Harbor, which made keeping the cannon secure from a more agitated population nearly impossible.
Just before midnight on August 23, 1775, a skirmish ensued between Lasher and Lamb’s men removing the cannon, and a British barge near the shore. It had been sent to monitor the rebels’ activity by Captain George Vandeput from the HMS Asia, a 64-gun British warship anchored near shore. Musket shots rang out, presumably started by the British, which resulted in the killing of a King’s soldier on the barge. As a result, the Asia turned broadside and opened fire with their cannons in a barrage on the city that lasted for three hours. A city whose population had already been diminished by the fear of a coming conflict, shrunk even further due to the terror experienced that night.
John Van Dyk spent most of the next eight years as an officer in General Henry Knox’s artillery while under the command of Colonel John Lamb. During the war, he saw action at Brooklyn, Harlem Heights, White Plains, Trenton, Brandywine, Germantown, Crosswicks Creek, Monmouth, and Short Hills. He was also at both Morristown winter encampments and Valley Forge. In 1780 he was captured by the British off the coast of New Jersey and confined on the prison ship HMS Jersey in Brooklyn before being released that summer.
Van Dyk had spent months out of commission in late 1779 and early 1780 with what, according to his symptoms, was probably malaria or yellow fever. He petitioned General Knox, who, in turn, appealed to General Washington for leave to recuperate. Making his way to West Point to meet with General Washington he was instructed by the Commander-in-Chief’s aide-de-camp to be evaluated by Dr. John Cochran, physician and surgeon general of the army of the Middle Department. On Cochran’s recommendation, General Washington wrote to President Samuel Huntington asking that the Continental Congress grant Van Dyk’s petition for an 8-month Furlow to sea to convalesce, which was common at the time as it was believed the fresh sea air was helpful to healing. Approved, it would take six months before he boarded the brig General Reed with a crew of 120 and 16 guns, a privateer out of Philadelphia commanded by Samuel Davidson. Once aboard ship he was temporarily made a Lieutenant of Marines.
Only two days into the voyage, on April 21, 1780, things took an immediate turn for the worse when they were intercepted and captured by the 28-gun HMS Iris and the 16-gun sloop HMS Vulture. The Iris was the former American warship USS Hancock, captured in July of 1777 and renamed by the British. Van Dyk was brought to Brooklyn and placed on the prison ship Jersey in Wallabout Bay, one of the most notorious and deadly places for holding American prisoners of war. Conditions were so poor that, while approximately 6,800 American soldiers died in battle during the Revolution, over 11,000 prisoners died on the Jersey alone! Fortunately for John Van Dyk, American officers were often traded off the Jersey for British officers who were in the custody of American forces. Within two months he was released and traveled to his temporary home of Elizabethtown, New Jersey to finish recuperating before rejoining Lamb’s artillery in Tappan, New York.
John Van Dyk had experienced many horrors of war in the years and months leading up to the morning of September 21, 1780, when British Major John André, an Adjutant General to British General Sir Henry Clinton, left New York City and sailed up the Hudson River. This pivotal incident would brand one of Washington’s closest generals a traitor and lead to the death of the esteemed and well-liked André. Ironically, Major André traveled on the very same sloop that had assisted in the capture of Captain Van Dyk just six months earlier.
Bio:
Jeffrey Wilford has been an educator in Maine for over 30 years where he holds certifications in history and science. He received a bachelor’s degree in communications with an emphasis in journalism from California State University – Fullerton and a master’s degree in education, teaching and learning, from the University of Maine. In addition to his career teaching, he has worked as a general assignment newspaper reporter and an assistant to the press secretary of former Maine Governor and US Congressman Joseph Brennen. He lives in Maine with his wife Nicolette Rolde Wilford.
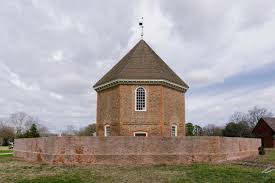
Powder Magazine, Colonial Williamsburg, VA in 2025
Today marks the 250th anniversary of the Virginia Powder Alarm in Williamsburg, VA. To commemorate the anniversary, join us this Sunday, April 27th at 7pm on our Facebook page as we welcome ERW historians Rob Orrison, Mark Maloy with Maureen Wiese and J. Michael Moore to discuss the events leading up to the April 21, 1775 Powder Incident in Williamsburg, VA. A few days after Lexington and Concord (unknown to the Virginians at the time), Governor Lord Dunmore removed powder from the magazine in Williamsburg. This event led Patrick Henry to lead militia towards Williamsburg and possible standoff with the Governor. As news arrived on April 28 of the bloodshed outside of Boston, tensions rose even higher.
Join us as we discuss another 250th anniversary event that led to the beginning of the American Revolution. This podcast will be recorded and posted on our Facebook page on April 27th at 7pm. Then it will be posted to your You Tube and Spotify pages.
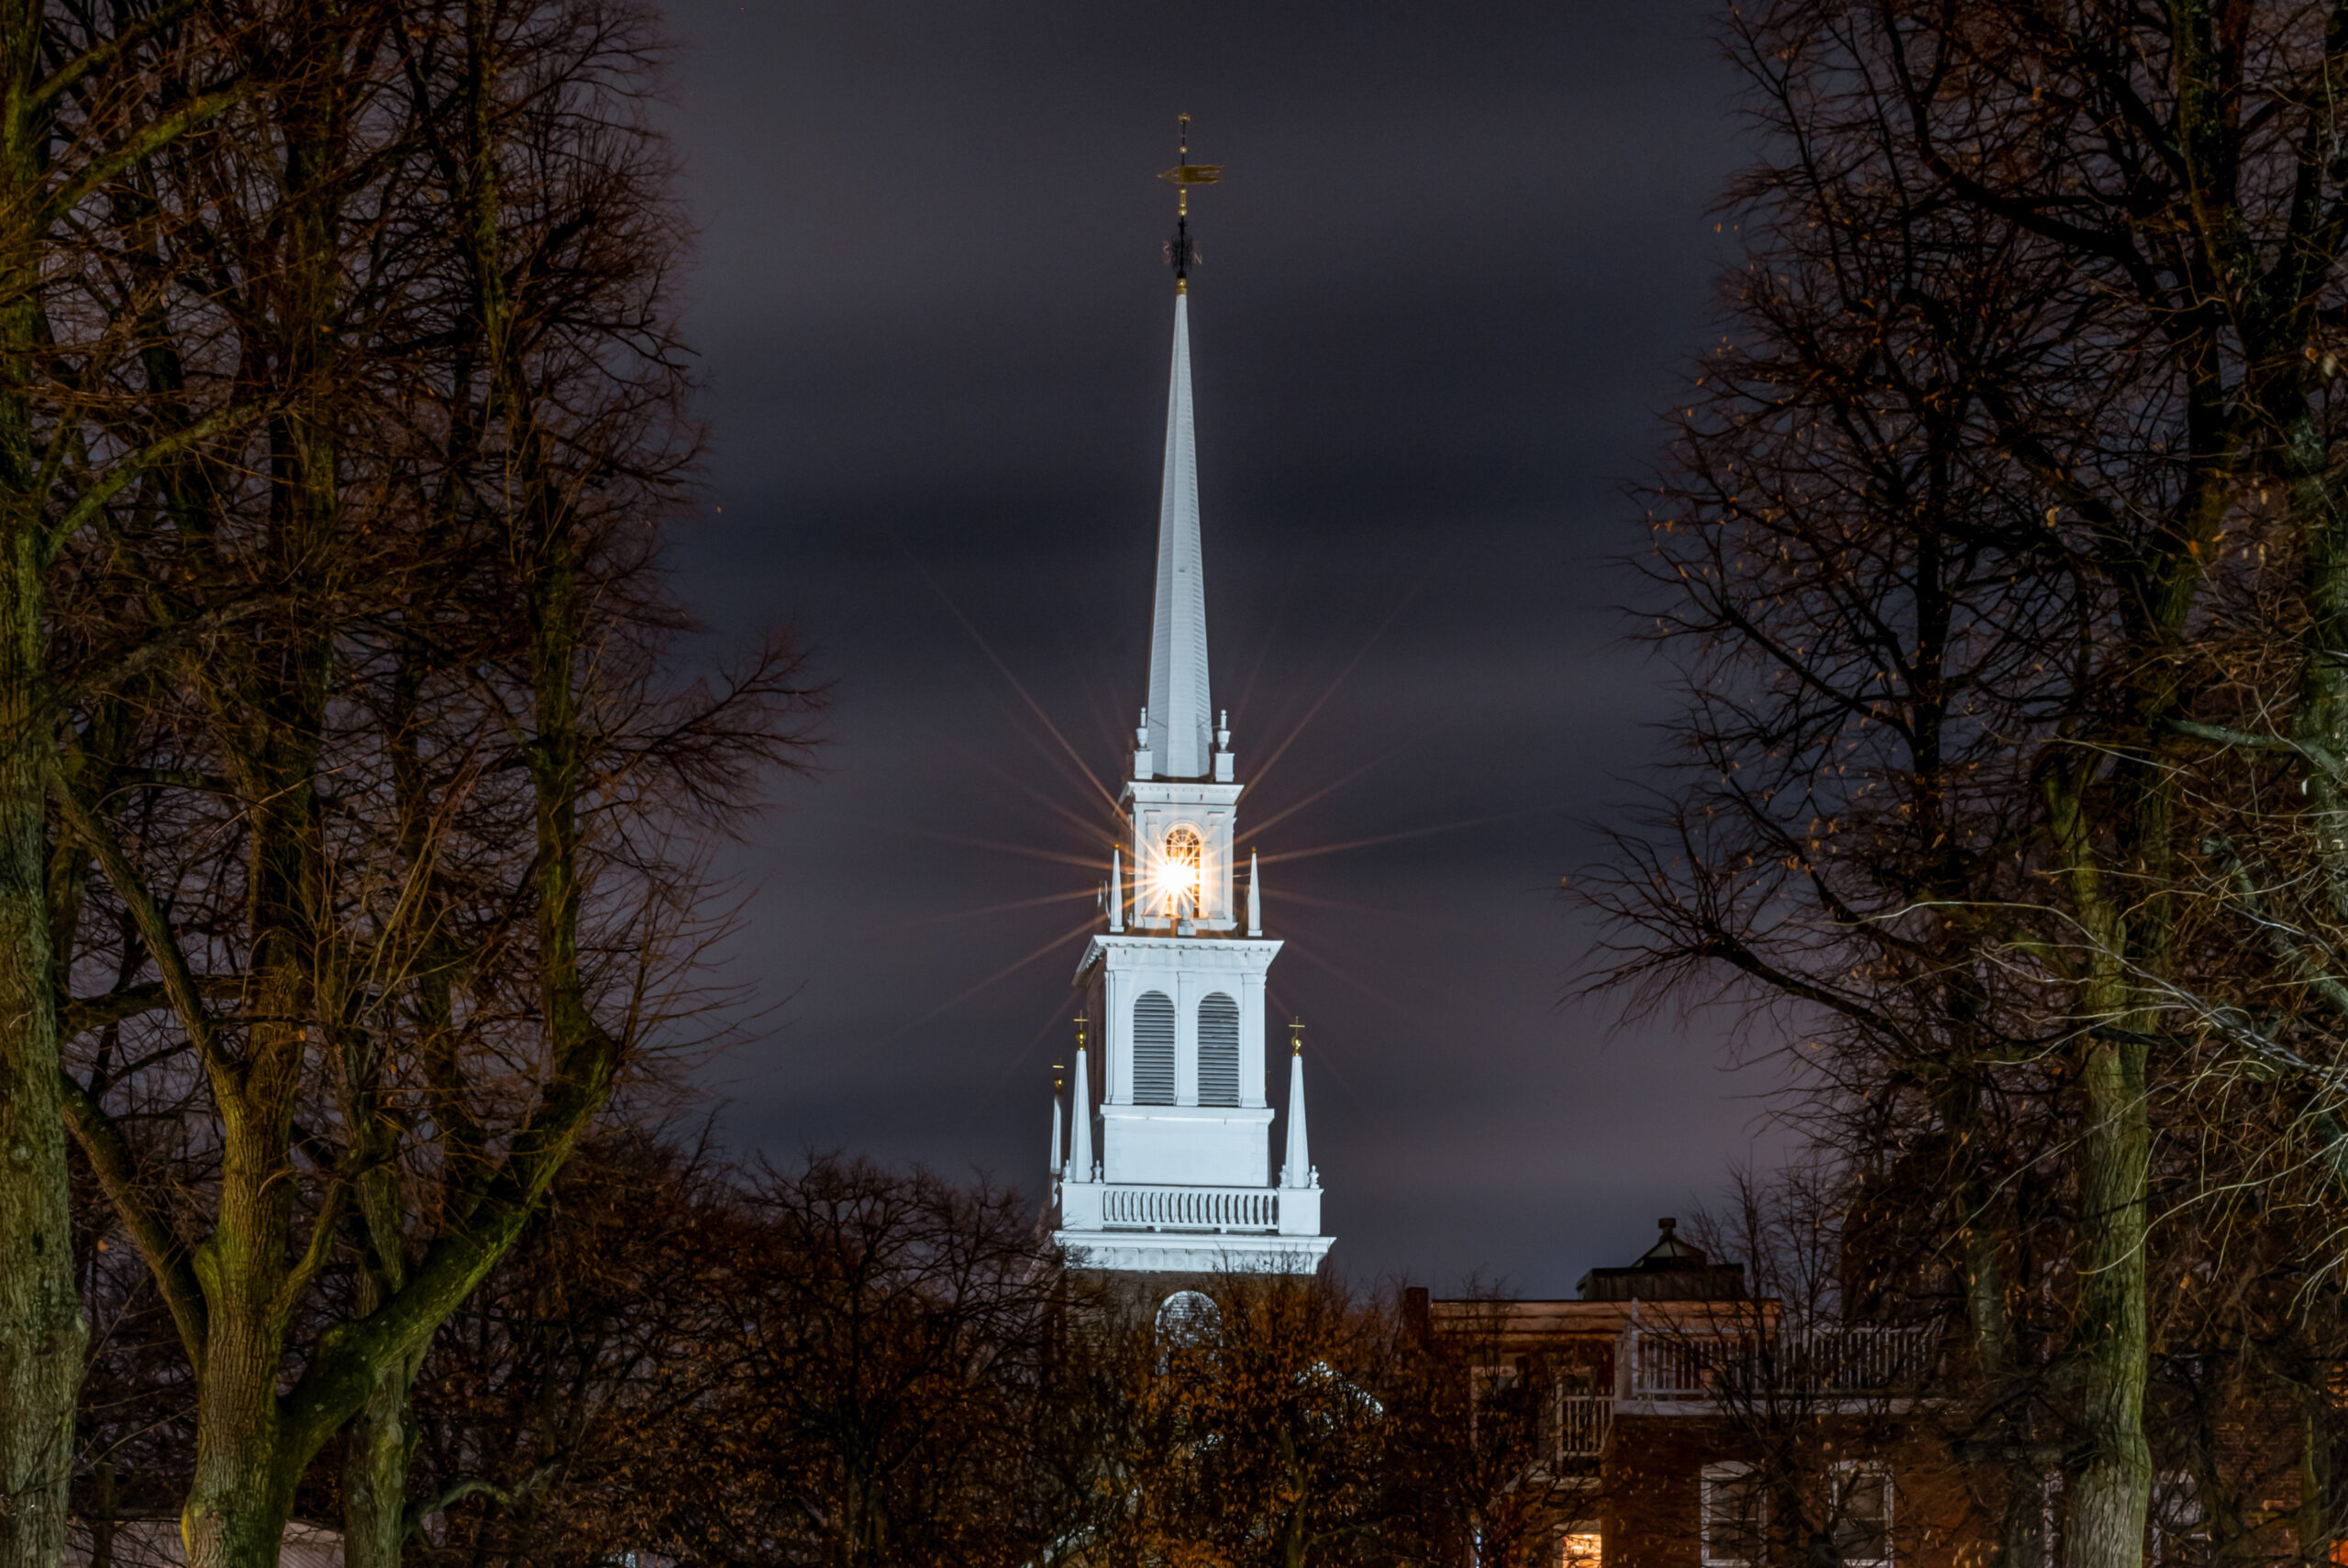
“He said to his friend, “If the British march By land or sea from the town to-night, Hang a lantern aloft in the belfry arch Of the North Church tower as a signal light,– One, if by land, and two, if by sea;”
These famous words from Henry Wadsworth Longfellow’s poem about Paul Revere’s ride recount the important role the Old North Church played in the events leading up to the first shots of the Revolutionary War. Join us just a few weeks before the 250th anniversary as we sit down with Emily Spence, Director of Education at Old North Church in Boston. We’ll discuss the history of the church, what occurred on April 18, 1775 and what happened during the war. We’ll also discuss the exciting events the Old North Church will be doing on the 250th anniversary. This will be a pre-recorded video and you will be able to watch it when we post it at 7 p.m. on our Facebook page.