Is it too early to make plans for March? Never, right?
Well, if you are looking forward to spring and want to mix in some Revolutionary War history, look no further than the America’ History LLC Conference the weekend of March 24 through 26, 2017 in Historic Williamsburg, Virginia.
For those arriving early, you can take advantage of a Yorktown Battlefield Tour led by Bill Walsh on Friday afternoon. That evening the conference adds a new element in 2017 with a welcoming reception with the speakers. A panel discussion with all the speakers will focus on “Lies and Legends of the American Revolution.” In regards to the speakers for the event, America’s History LLC. have compiled an all-star lineup.
Spearheaded by Edward Lengel and David Preston. These two gentlemen will be joined by historians James Kirby Martin, Mark Lender, John Grenier, Michael Gabriel, Dennis Conrad, Robert Smith, and Robert Selig.
The conference wraps up on Sunday. For more information and how to register for the conference, click here.
Emerging Revolutionary War welcomes back guest historian Malanna Henderson
Part One
“It is not for their own land they fought, not even for a land which had adopted them, but for a land which had enslaved them, and whose laws, even in freedom, oftener oppressed than protected. Bravery, under such circumstances, has a peculiar beauty and merit.” – Harriet Beecher Stowe.
The words spoken by “the little woman who wrote the book that started this Great War,” so said Abraham Lincoln, according to legend, upon meeting Mrs. Stowe sometime in 1862, rang true for black patriots in the Civil War as well as those in the Revolutionary War.
The Smithsonian tome, The American Revolutionary War: A Visual History quotes a Hessian officer in 1777, as saying, “No regiment is to be seen in which there are not Negroes in abundance and among them are able-bodied and strong fellows.”
In every battle of the Revolutionary War from Lexington to Yorktown; black men, slave and free, picked up the musket and defended America; and yet, many historians as well as visual artists have omitted their contributions in the history books and their images on canvases depicting historic battles. The need for white historians to “overlook,” “underestimate,” and or “erase,” these sacrifices is a gross negligence that distorts and misrepresents American history; and furthermore, it continues to disenfranchise the patriotic heroes of the past and malign the self-image of millions of Americans today simply because of the color of their skin.
Black soldiers have always fought two wars simultaneously; wars declared by their government and the unspoken wars at home for liberty, equality and before the Civil War, for citizenship.
What kind of men fight for the liberty of others when their own liberty isn’t guaranteed?
True patriots: James Armistead Lafayette was one such person.
James Armistead Lafayette (1760-1832) Blackpast.org
Slaves serving in the rebel military was a question that manifested itself early amongst the colonial government agencies. Their presence rankled many, while others welcomed them and praised their bravery. Some men of color had fought gallantly and with distinction as they stood alongside their white compatriots, defenders of liberty on the Lexington Green in April of 1775.
For instance, in the Battle of Bunker Hill, Peter Salem, a slave, served with courage under fire, as varying accounts reported. Salem was introduced to George Washington as “the man who shot Pitcairn,” the British Royal Marine Major who shouted to his men before Salem shot him down, “The day is ours.” Despite the competence and bravery of such men on the battlefield their exploits didn’t convert the wide-spread reluctance of most colonists to accept black men as soldiers.
General George Washington, Commander-in-Chief of the Continental Army, harbored the same common prejudices of the southern-planter ruling class of which he was a member. In July, he instructed recruiters “not to enlist any stroller, negro, or vagabond, or person suspected of being an enemy to the liberty of America.” Commanders in each colony and regiment made up their own minds. Some ignored his command. Their decision was based on need and experience. Those who had already served successfully with black militia and minutemen may have seen no cause to alter their regiments.
By December of 1776, Washington back-pedaled on his decision, allowing for black veterans of Lexington, Concord and Bunker Hill to serve; but of the slave, he maintained his objection. However, some junior officers appreciated the contributions of blacks. Col. John Thomas wrote John Adams on October 24, 1775, “We have negroes, but I look upon them as equally serviceable with other men, for fatigue (labor); and, in action many of them have proven themselves brave.”
As the war raged on, the necessity for able-bodied men settled the question. White soldiers, who usually served for only a few months to a year, mustered out, died or were wounded; while others deserted. Black soldiers who expected to receive their freedom if they served were in the war for the duration. This was a positive factor for the commanding officers who had to re-train all new recruits. Around five-thousand blacks served in the Revolutionary War as soldiers. However, a vast unknown number provided a myriad of support services.
Another reason the colonials reconsidered enlisting blacks was the bold military tactic that occurred in November of 1775. Lord Dunmore, the last royal governor of Virginia, ratified a proclamation freeing all indentured servants and slaves of rebels if they would fight for the British. Thousands of people fled the plantations to gain their freedom. This single act struck a devastating blow on two fronts, it threaten their economic stability and increased the tension between master and slave, with the master fearing slave revolts and the permanent loss of their property. Moreover, it upset the social order. Enslaved men serving alongside whites put them on an equal footing in the battlefield, which violated the white supremacy dogma that governed current thought and practice.
Born into slavery on December 10, 1748, in New Kent, Virginia to owner William Armistead, James enlisted in the Revolutionary War under General Marquis de Lafayette in 1781. His owner was a patriot and most likely received the bonus James would have gotten for enlisting had he been free or white. Enlistment bonuses comprised of money, land or slaves.
By the time Armistead entered the war, the efforts of Benjamin Franklin and other colonial agents had secured a military and economic alliance with the French. A long-time imperial rival of British expansion, the French provided naval ships, money and personnel.
Marquis de Lafayette (born Marie Joseph Paul Yves Roch Gilbert du Motier) was a descendant of ancient French nobility. His father, a colonel in the French Grenadiers had died in the Seven Year’s War (known as the French and Indian War in America) when the young nobleman was only two years old. The political ideals of liberty and equality espoused by the colonials matched his beliefs and fired his military ambitions. Perchance, his yearning to play a role in America’s fight for independence from British rule may have been spawned by a desire to avenge his father’s death.
Since Lord Dunmore’s Proclamation, it was easy for Armistead to gain access in the enemy camps as a runaway slave seeking his freedom. While providing varied services to the British, he gained the confidence of Brigadier General Benedict Arnold, who by now had defected to the British. He charged Armistead with scouting, foraging and spying. Armistead was able to comfortably go between both camps, in essence becoming a double spy. He carried false and misleading information to the British but provided accurate intelligence on the movement of British forces and details of their military strategies to General Lafayette.
When Arnold left Virginia, Armistead was able to deceive General Charles Cornwallis as well, who rampaged through parts of Virginia and burned Richmond, the capital. He sent Colonel Banastre Tarleton to capture the entire legislative assembly, which included Daniel Boone, Patrick Henry and the governor. The plan was thwarted by an astute young man named Jack Jouett. Although, a few were apprehended, among them Daniel Boone; Jouett’s actions prevented the British from arresting the biggest prize: Governor Thomas Jefferson.
By early August, Cornwallis had made plans to establish fortifications in Yorktown, expecting reinforcements to increase his troops of approximately nine-thousand.
General Washington, in the meantime, had joined forces with Comte de Rochambeau to recapture New York. With intelligence supplied by James Armistead, they learned that Cornwallis was in Yorktown waiting for military support. French Admiral de Grasse, with a fleet of about twenty-eight naval ships, was on his way to the Chesapeake from St. Dominick (present-day Haiti). A plan to surround Cornwallis by land and sea appeared possible. The French naval fleet, along with the Washington’s Continental and Rochambeau’s French forces, headed to the enemy’s headquarters. Once Washington reached Yorktown, General Lafayette’s regiment joined him. Thus, Armistead’s accurate and meticulous reports were vital to the American victory that culminated in Yorktown on October 19, 1781.
Later Cornwallis met the Marquis at his headquarters and was flabbergasted to find his spy James Armistead present.
The Treaty of Paris in 1783 severed ties from Britain, the mother country, and established America as an independent nation. That same year, the Act of 1783 was passed freeing slaves who had fought in the Revolutionary War on their masters’ behalf. However, it excluded slave-spies. Ergo, James Armistead, who risked his life by providing information to help win the freedom of many, was himself denied freedom. Was his life in less danger operating under subterfuge as a spy amongst the British than it would have been, had he served as a soldier on the battlefield? I think not. Had his espionage been discovered, he surely would have had to forfeit his life.
After the war, Armistead was returned to slavery. Even his own master didn’t have the legal right to free him because of the Act of 1783, omitting slave-spies from emancipation.
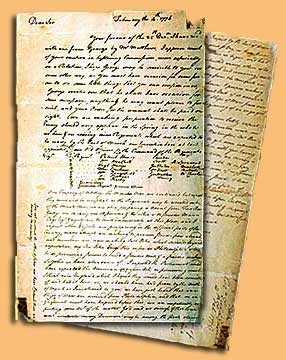
When learning of his compatriot’s status, the Marquis penned a certificate to the Virginia legislator in October of 1784 imploring them to grant Armistead his freedom, declaring:
“This is to Certify that the Bearer By the Name of James Armistead Has done Essential Services to me While I had the Honour to Command in this State. His Intelligences from the Ennemy’s Camp were Industriously Collected and More faithfully deliver’d. He properly Acquitted Himself with Some Important Commissions I Gave Him and Appears to me Entitled to Every Reward his Situation Can Admit of. Done Under my Hand,” Richmond, November 21st 1784.
The legislator didn’t act upon the request straightaway. However, again in 1786, James Armistead applied for his freedom and it was duly granted on January 9, 1787, with a fair compensation to his master, William.
In honor of his benefactor, James Armistead added Lafayette to his surname. After emancipation, he moved a short distance south of New Kent, near Richmond, Virginia and acquired forty acres of less than suitable farmland. He married and had a family. He even owned slaves. History doesn’t tell us if he bought enslaved relatives to free them or if they were bought to farm his land as field hands.
It wasn’t until 1819 that he applied to the state legislature for financial assistance to ease his poverty. This time, the response was immediate; he received $60 and an annual pension of $40 for his service during the Revolutionary War.
Unlike James Armistead Lafayette, many blacks who worked as laborers, guides, messengers and spies were not as fortunate. Whether they were pressed into service or willingly answered the call, most neither received their freedom nor wages for their behind-the-scene contributions to the war.
In 1824, the Marquis de Lafayette visited the United States and was lauded as a hero of the American Revolutionary War in Richmond with festivities and a parade. Spying Armistead in the crowd, it is said he halted the procession, dismounted from his horse and embraced his old comrade.
Kareem Abdul-Jabbar and Alan Steinberg Black Profiles in Courage: A Legacy of African-American Achievement. (New York: William Morrow and Company, Inc.1996) pages 32-34.
Col. Michael Lee Lanning (Ret.) Defenders of Liberty: African Americans in the Revolutionary War. (New York: Kensington Publishing Corp. 2000) pages 45-46; 130
Emerging Revolutionary War is honored to welcome guest historian Katie Turner Getty. A short biography is at the bottom of the post.
In terms of historical significance, few American cities rival Boston, where shades and shadows of the Revolution can be found around every corner. By walking the city’s famous Freedom Trail, one can follow in the literal footsteps of the inhabitants who left such an indelible mark on the city. Indeed, many heroes of revolutionary Boston—Revere, Adams, Otis—lie in their eternal repose in burying grounds mere steps from busy thoroughfares.
The presence of those revolutionaries still looms large in Boston and many of their old stomping grounds still stand. Several buildings located on the Freedom Trail played unforgettable parts in the revolution. From the fiery speeches at Old South Meeting House on the eve of the tea party to the blood shed by those massacred outside the Old State House*, these sites are popular and are frequently visited.
But there is one site not located on the Freedom Trail that is yet imbued with great historical import. Indeed, it is the site of the 1768 arrival of British warships in Boston Harbor and the troops who first took those fateful steps into Boston for the purposes of occupying the city.
East-facing view of Long Wharf and John Hancock’s office and counting house, built in 1763, and now the Chart House restaurant.
The name of this site, so often overlooked, is Long Wharf.
Long Wharf has stretched into the Atlantic from Boston for 300 years, serving as the world’s great doorway to the city. It was the longest wharf in Boston, extending 1,586 feet into the deep water of the harbor allowing up to 50 ships to dock at one time[1]. It would have been a place of great bustle—the loading and unloading of cargo by longshoremen, transporting of such cargo to the busy warehouses and shops that lined the wharf, and then the purchase of such goods by local people.
West-facing view toward Boston, from the end of Long Wharf. The Town House (now known as the Old State House), built in 1713, is in the distance.
On Friday, September 30, the Beaver, the Senegal, the Martin, the Glasgow, the Mermaid, the Romney**, the Launceston, and the Bonetta anchored in the harbor. On board the ships were “the 14th and 29th Regiments, a detachment from the 59th regiment, and an artillery train”.[2] The next day, Bostonians warily watched as “the war ships maneuvered closer to the town and ranged themselves as if for a siege.”[3] Then, carried off the warships by small boats, British troops stepped onto Long Wharf and into American history.
These ships and troops had arrived in the port of Boston as a response to colonial opposition to the Townshend Acts which were enacted by Parliament in 1767 in an effort to enforce their sovereignty over the colonies and raise revenue. The Townshend Acts imposed a tax on imports such as tea, glass, paper, and paints, as well as instituted a Customs board to help enforce British trade regulations and deter smuggling activity. Many Bostonians were opposed to the Townshend Acts and protested by gathering in mobs and harassing officials.
View of the Atlantic Ocean from the very end of Long Wharf.
Paul Revere immortalized the landing of the troops in an engraving entitled “A View Of Part of the Town of Boston In New England And Brittish [sic] Ships of War Landing Their Troops! 1768”. The image depicts the eight British ships of war arrived in the harbor, with smaller boats carrying red-coated soldiers to Long Wharf. Some troops are already amassed on the wharf, gathering into formation.
“A View of Part of the Town of Boston In New England And Brittish [sic] Ships of War Landing Their Troops! 1768” (courtesy of American Antiquarian Society http://www.americanantiquarian.org/Inventories/Revere/b2.htm )Revere’s engraving also shows many buildings running along the north side of Long Wharf in an uninterrupted line toward the town. They were warehouses, counting houses, shops, and dwellings. One of these buildings was John Hancock’s Counting House, which still stands on Long Wharf today. Currently incarnated as a restaurant called the Chart House, it is the oldest extant building on Long Wharf, built in 1763. John Hancock’s original wall safe is actually still set in the red brick wall of the second floor dining room. The safe is not off-limits; visitors may freely open and close the safe’s inner and outer doors or even run a hand over the smooth metal.
John Hancock’s original safe, still fixed in the wall of his Counting House.
When standing at the wall safe, take a few steps to the right and look out the front windows of the building. Look down to the ground level to see the path of the troops as they passed right by Hancock’s Counting House, “with insolent parade, drums beating, fifes playing, and colours flying, up King Street” as they headed down the wharf and into the town. The soldiers were marching to the Town House, at the base of King Street. And beyond that, to Boston Common.
View out a second floor window of Hancock’s Counting House, a few steps from the wall safe. The viewer is looking down at Long Wharf where the British troops marched past on October 1, 1768.
Long Wharf at the time (as it is today) was really just an extension of King Street, which ran all the way from the Town House (later to become the site of the Boston Massacre), down to the shoreline, then continued along in the form of a wharf, out into the harbor. After the Revolution, King Street was (perhaps appropriately) renamed State Street and is known by that decidedly more American moniker today.
The soldiers’ route may be traced today by any perambulating history enthusiast. Walk out past Hancock’s Counting House, to the terminus of Long Wharf and stand where the British soldiers disembarked. As you gaze out across the cold gray Atlantic, feel the stiff sea breeze rolling in off the water just as they did. Then turn your gaze away from the Atlantic and look back toward the city. The view is the same as in 1768—the Town House will be in your direct line of sight. As the soldiers marched down the wharf in a straight line, they too would have seen the Town House quite clearly.
A pamphlet published by the Boston Redevelopment Authority in the 1980s reveals that although the wooden timbers of Long Wharf are experiencing decay, the 17th and 18th century granite bulkheads beneath the wharf are still intact.[4] It is a thrill for any revolutionary history enthusiast to walk out to the end of Long Wharf, knowing that deep beneath his or her feet are the very same granite blocks, impervious to time and history, that bore silent witness to the arrival of the British soldiers who stepped onto Long Wharf and into history when they came to occupy Boston.
*The building known today as the Old State House was known in the 1770s as the Town House.
**The Romney actually arrived in Boston Harbor in May 1768 to help enforce customs and discourage the flouting of trade regulations, attempting to seize John Hancock’s ship, Liberty.
*Katie Turner Getty is a lawyer, history enthusiast, and lifelong resident of Boston. She holds an A.A. from Bunker Hill Community College in Charlestown, Massachusetts, a B.A. in History from Wellesley College, and a J.D. from New England Law Boston. She can often be found exploring historic sites both on and off the Freedom Trail.
[2] Paul Revere, A View of Part of the Town of Boston in New England and Brittish [sic] Ships Landing Their Troops! 1768, circa 1770, engraving, 26 x 40.5 cm, American Antiquarian Society, Worcester, Massachusetts http://www.americanantiquarian.org/Inventories/Revere/b2f1.jpg
[3] Richard Archer, As If An Enemy’s Country (Oxford: Oxford University Press 2010), xiv.
Emerging Revolutionary War is honored to welcome back historian Malanna Henderson.
Part One
N-7 Fredericksburg Gun Manufactory State Marker
Located at 200 Gunnery Road between Dunmore and Ferdinand Streets is the Old Walker-Grant public school. The three-acre campus is home to the Fredericksburg Regional Head Start educational program. Built in 1938, Walker-Grant was the first publically financed high school for black youth in Fredericksburg. The institution was named for Joseph Walker and Jason Grant.
Walker, born into slavery in Spotsylvania County in 1854, was freed after the Civil War and moved to Fredericksburg. Employed in a paper mill, Walker was self-taught and had a keen interest in expanding educational opportunities for black youth. He served as the sexton at St. George’s Episcopal Church for more than 50 years. Jason Grant was born free in Chatham, Ontario, Canada, in 1861 to a middle-class family. He attended Wilberforce Educational Institute in Ohio. He met an inspiring educator from Fredericksburg and decided to move there and teach. Grant taught at the county and city schools and also served as principal. His career spanned 42 years. Both Walker and Grant worked diligently to establish a learning institution for black children whose educational opportunities were marginalized by the social order of the day: segregation and racial discrimination.
Over two-hundred years ago, this location was once the site of the Fredericksburg Gunnery plant; the first government ran factory of its kind in the nation. Established in 1776, its existence was paramount to the victory of the Continental forces in winning the Revolutionary War.
By then, the colonists had interpreted an array of British economic policies as threatening their rights as Englishmen. When a slew of taxes were demanded of the colonists who were accustomed to governing themselves, their rebellious cry became, “no taxation without representation.” Until then, the planter-statesmen and other notables still felt they could reconcile with the mother country, despite the occurrences of the Boston Massacre in 1770 and the Boston Tea Party in 1773. However, in Virginia an odious act by the royal governor put the colonists on notice that the British were willing to spill more blood in an effort to vanquish the rebellion.
In the dead of night, on April 21, 1775, a mixed military unit of His Majesty’s Navy and Marines confiscated gun powder and armaments from the Williamsburg Magazine. This vital repository of weapons was stockpiled for the defense against Indian raids, slave revolts and riots. The action of the British soldiers left Virginia virtually defenseless.
John Murray, Fourth Earl of Dunmore and the last royal governor of Virginia ordered the raid. Many colonists saw this as the last straw. Dunmore had repeatedly rebuked the colonial statesmen’s demands, dissolving the House of Burgess and other political committees. An aristocrat, accustomed to having his word obeyed without question, Dunmore saw the burgeoning independence of the statesmen as an affront to his authority and responded by acts of retribution instead of compromise.
Blood had already been spilt at the Battles of Lexington and Concord a few days prior. Thus, disarming the colonists seemed a logical strategy to weaken their resolve. The shot heard around the world occurred in the north and in the south; the stealth act of a midnight raid struck a wedge between Britain and the American colonies that was irreparable.
The colonists had to arm themselves if they were going to war with England, whose military might seemed Herculean to the limited martial skills of the local colonial militias. There was no standing army. Each of the thirteen colonies had their own reservists, comprised of farmers, merchants and tradesmen who were needed sporadically for lawless incidents.
On July 17, 1775, the Third Virginia Convention convened in Richmond to create a working government structure. Delegates were elected to serve on the Committee of Safety, which replaced the Committee of Correspondence. Its powers were comparable to the defunct House of Burgess. The most important resolutions that sprung from those meetings were to raise two regiments, a total of sixteen companies of sixty-eight men each to serve one year tours. In addition, sixteen districts of Minutemen were planned. In all of the county militias, the remaining free white males between the ages of fifteen to fifty were to muster, eleven times a year. Below is a page from Colonel Lewis’s manual on military exercises and drills, dated 1777.
(Courtesy of The George Washington Foundation)
The last meeting of the convention took place on the 26th of August. An ordinance to build a gun manufacturing plant was enacted. One prominent Virginian intellectual described it as, a first step “in open defiance of British parliamentary law.”
The five commissioners appointed to operate the gun factory were Mann Page; William Fitzhugh; Samuel Selden; Charles Dick and Fielding Lewis, George Washington’s brother-in-law, husband to his sister Betty Washington. Lewis was elected chairman of the Committee. As it turned out, the only men who stayed the course was Charles Dick and Fielding Lewis.
Initially, the convention issued to Lewis 2,000 pounds to construct the gun manufacturing plant. Early in November, Lewis purchased a ten-acre tract of land located south of town. He also leased a nearby mill on four town lots.
Knowing how desperate the Continental Army was for arms, Lewis penned a letter, on February 4, 1776, to George Washington in haste. Now the Commander-in-chief of the Continental Army, George received this letter from Fielding describing the developments of the factory and the formation of the army regiments they were establishing. Of note, in August of 1775, Patrick Henry was named Colonel of the 1st Regiment, and the 2nd Regiment was commanded by William Woodford with Alexander Spotswood serving as major. In January of 1777, Hugh Mercer was named Colonel of the 3rd Regiment.
(Courtesy of The George Washington Foundation)
“…our Gunn Manufactory is now beginning & expect by New Years day to have near fifty Men imploy’d who will make about Twelve Gunns compleat a Day…”
The gunnery was close to the Hunter Iron Works, an important supplier. James Hunter, the owner, added the manufacturing of muskets to his production output, independent of government funding. He also supplied regiments with axes, spades, shovels and mattocks.
The items produced at the Fredericksburg Gunnery were muskets, bayonets, flint locks, ramrods and more. The plant encompassed a main manufactory, a stone powder magazine, cartridge works, repair shops and a vegetable garden, for the benefit of the employees.
Charles Dick ran the day to day operations, hiring a master workman and artisans. Although, the very capable Mr. Dick never discussed his origins or even his birthdate; the self-made man wasn’t a member of the established gentry. However, he easily found his place amongst Fredericksburg’s leading citizens. Dick was a successful merchant, land owner, Mason and a well-respected member of the community. He served on several important civic organizations; the Committee of Correspondence and later the Committee of Safety. A business partner and personal friend of Fielding Lewis, Dick was godfather to Lewis’ first son.
On September 22, 1775 an advertisement for locksmiths was published, most likely in the Virginia Gazette. Dick needed gunsmiths, artisans and a variety of other laborers to make the gunnery productive. It was evident, early on, that there was a deficiency of expert gunsmiths ready for hire. The House of Delegates passed an apprentice act so Dick could train a class of artisans from the white youth in the area. The young men would be housed, fed and clothed; all paid for by the government. Dick forbade the drinking of beer and rum at the establishment, a drastic change from Eighteenth Century practices. Three black men were engaged to cook, bake and do an assortment of odd jobs. Whether they were slave or free is unknown.
In an emergency the aristocrats of the town, women, too, worked at the factory stuffing cartridges, etc., for the more than one hundred guns hastily readied for the Fredericksburg and Spotsylvania militia. The most commonly used weapon at the time was the British Brown Bess, a muzzle-loading smoothbore musket. It fired a single shot ball or a cluster shot which fired multiple projectiles like a shotgun. About four shots per minute was the typical output from most soldiers. By May of 1777, the factory produced similar muskets to the British Brown Bess by the rate of twenty per week.
Emerging Revolutionary War is honored to welcome back guest historian David A. Powell.
When George Washington opened fire on a small party of Canadian militia commanded by Joseph Coulon de Villiers de Jumonville in May of 1754, he fired the first shots of what would eventually become the French and Indian War – and the Seven Years War across the rest of the globe. Many scholars have also acknowledged that this incident set the spark for what would become our own American Revolution.
Braddock’s Defeat: The Battle of the Monongahela and the Road to Revolution, by David Preston.
Of course, Washington intended none of those things; instead he was carrying out the British Crown’s policy of staking claim to and defending the Ohio Country, lately disputed between France and Britain. However, Jumonville’s death set irreversible forces in motion, not the least of which was the capture of Washington’s own company of Virginia Colonial Militia at Fort Necessity by a much larger French response in June of 1754.
The direct consequence of that encounter was the creation of a new British army, including two regiments of regulars and a train of artillery, rushed from Ireland and England to re-assert Crown control over the forks of the Ohio. Command of this new expedition fell to Major General Edward Braddock. Arriving in 1755, Braddock’s mission was to lead this new force from Fort Cumberland, in western Maryland, to the site of the French Fort Duquesne (present-day Pittsburgh.) That campaign ended in disaster on July 9, 1755 when Braddock’s column collided with a combined force of French and Indians just a dozen miles short of Duquesne, resulting in horrific British losses – including Braddock.
Not surprisingly, this story has been fertile ground for historians. Fine monographs have already been written on the campaign, as well as on the French and Indian War as a whole. Having a particular interest in the period, I have read a number of those works. Naturally, I was curious when I first heard of Dr. David Preston’s new book exploring the campaign.
Preston, a professor at the Citadel, has delivered a tremendous book. Combining new research and close analysis of previously known sources, he provides fresh new perspective on General Edward Braddock, his ill-fated expedition, and the French & Indians opposing him.
Preston finds that Braddock, far from being an unyielding martinet uninterested in either the “savages” or using Colonials, worked hard (if unsuccessfully) to bring Indian warriors into his force, and showed more respect for the colonial elements under his command than some previous historians have portrayed. A number of factors precluded Braddock’s success here, but it was not for want of trying.
Where Preston’s interpretation really shines is in exploring the French and Indian sides of the war. A new account of the battle, located in a French archive, casts new light on the French efforts to defend Fort Duquesne – a venture whose success was by no means a sure thing. Preston also explores the Indian Nations’ complex and diverse reasons for casting their support with the French, which was also not certain. Preston makes it clear that the French defense was in many ways based on fortuitous circumstances rather than planning, especially in regards to the timing of the campaign.
Preston’s detailed description of the battle in question on July 9 presents a clear and detailed exploration of the sequence events as far as they can be known; where the author speculates he notes that, and explains the basis of his interpretation. Above all, his narrative is well-written, exciting and drama-filled.
Preston also excels in his summation of the long-term impact of Braddock’s defeat, both on the fortunes of British North America in the two years following the battle (which ran from bad to disastrous) and on the longer term consequences: the development of light infantry and ranger tactics, leadership, and the growing rift between American colonials and England.
Students of both the Seven Years War in America and the American Revolution will want to read Braddock’s Defeat. Get your copy today.
On this date, in 1781, the British army marched out of their entrenchments at Yorktown and surrendered to General George Washington and the combined Continental and French armies.
Modern view of the “Surrender at Yorktown” site (P. Greenwalt)
Although the victory did not conclusively end the war, the victory prompted British Prime Minister, Lord Frederick North, to exclaim,
“Oh, God, it is all over!”
Approximately two years later, with the signing of the Treaty of Paris on September 3, 1783, the American Revolutionary War was truly over.
What is not truly over is the efforts to preserve, interpret, and educate the current and future generations about the importance of Yorktown and the American Revolution. In the spring, the new American Revolution Museum of Yorktown will open its doors, updating the Victory Center at Yorktown Museum.
From the Jamestown-Yorktown Foundation website, the museum’s goals are to;
“Through comprehensive, immersive indoor exhibits and outdoor living history, the American Revolution Museum at Yorktown offers a truly national perspective, conveying a sense of the transformational nature and epic scale of the Revolution and the richness and complexity of the country’s Revolutionary heritage.”
For more information about the museum, what it entails, and the opening date, click here.
Emerging Revolutionary War welcomes back historian Bert Dunkerly. The accounts below come from Mr. Dunkerly’s book on the battle.
“The Battle of Kings Mountain, Eyewitness Accounts” by Bert Dunkerly (Acadia Publishing)
The battle of Kings Mountain was an intense, one-hour battle fought just below the North Carolina-South Carolina border. The October 1780 engagement pitted about 900 American militia from five states (Virginia, the two Carolinas, Georgia, and modern-day Tennessee) against 1,100 Loyalists under Maj. Patrick Ferguson. With Ferguson’s wounding late in the action, command fell to his subordinate, Captain Abraham DePeyster. As the Americans closed in, the Loyalists surrendered.
Eyewitness accounts provide details of the battle, especially its lesser known aspects like the conclusion of the battle and subsequent Loyalist surrender. Here are a few detailed accounts, presented with original spelling and grammar.
Virginia militiaman Leonard Hice had quite an experience in the battle, being wounded four times. He would spend two years recovering:
“I was commanded by Captain James Dysart where I was dreadfully wounded, I received two bullets in my left arm and it was broken. We were fighting in the woods and with the assistance of my commander who would push my bullets down, I shot 3 rounds before I was shot down. I then received a bullet through my left leg. The fourth bullet I received in my right knee which shattered the bone by my right thigh and brought me to the ground. When on the ground I received a bullet in my breast and was bourne off the ground to a doctor.”
Andrew Cresswell was a militiaman from Virginia who found himself too far in front during the final phase of the battle. He also was fortunate to witness the surrender and provided one of the only accounts of Captain Abraham DePeyster surrendering to Colonel William Campbell. His account also speaks to the brutal nature of the fighting between Loyalist and Whig.
“I saw the smoke of their guns and as I saw but one man further round than myself I spoke to him and told him we had better take care least we might make a mistake. I retreated about ten paces where I discharged my gun. About that moment they began to run. I waited for nobody. I ran without a halt till I came to the center of their encampment at which moment the flag was raised for quarters. I saw Capt. DePeyster start from amongst his dirty crew on my right seeing him coming a direct course towards me. I looked round to my left I saw Col. Campbell of Virginia on my left DePeyster came forward with his swoard hilt foremost. Campbell accosted him in these words “I am happy to see you Sir. DePeyster, in answer swore by his maker he was not happy to see him under the present circumstances at the same time delivered up his sword – Campbell received the sword, turned it round in his hand and handed it back telling him to return to his post which he received. Rejoining these words, God eternally damn the Tories to Hell’s Flames and so the scene ended as to the surrender.”
Lt Anthony Alliare was a New York Loyalist in Ferguson’s command. He recounts the experience of the New York detachment, which launched a series of unsuccessful bayonet charges early in the battle. His reference to the “North Carolina regiment” refers to local Loyalist troops fighting alongside his men.
“The action continued an hour and five minutes, but their numbers enabled them to surround us. The North Carolina regiment seeing this, and numbers being out of ammunition, gave way, which naturally threw the rest of the militia into confusion. Our poor little detachment, which consisted of only seventy men when we marched to the field of action, were all killed and wounded by twenty, and those brave fellows were soon crowded as close as possible by the militia.’
Ensign Robert Campbell of Virginia also witnessed the close of the battle, and recounts a white flag being raised.
“It was about this time that Colonel Campbell advanced in front of his men, and climbed over a steep rock close by the enemy’s lines to get a view of their situation and saw they were retreating from behind the rocks that were near to him. As soon as Captain Dupoister observed that Colonel Ferguson was killed, he raised flag and called for quarters. It was soon taken out of his hand by one of the officers on horseback, and raised so high that it could be seen by our line, and the firing immediately ceased. The Loyalists, at the time of their surrender, were driven into a crowd, and being closely surrounded, they could not have made any further resistance.”
Isaac Shelby, from the Carolina frontier (modern Tennessee) was a militia commander in the battle. He also provides insights in the battle’s final moments.
“They were ordered to throw down their arms; which they did, and surrendered themselves prisoners at discretion. It was some time before a complete cessation of the firing, on our part, could be effected. Our men, who had been scattered in the battle, were continually coming up, and continued to fire, without comprehending in the heat of the moment, what had happened; and some, who had heard that at Buford’s defeat the British had refused quarters to many who asked it, were willing to follow that bad example. Owing to these causes, the ignorance of some, and the disposition of other to retaliate, it required some time, and some exertion on the art of the offices, to put an entire stop to the firing. After the surrender of the enemy, our men gave spontaneously three loud and long shouts.”
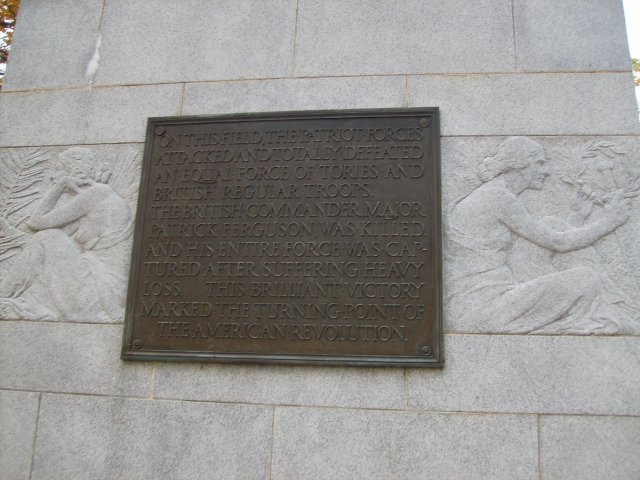
In one hour, the entire Loyalist force of 1,100 was killed, wounded, or captured. October 7 marks the anniversary of this battle which, in the words of Thomas Jefferson, was the “turn of the tide of success.”
Plaque at Kings Mountain National Military Park
Robert M. Dunkerly (Bert) is a historian, award-winning author, and speaker who is actively involved in historic preservation and research. He holds a degree in History from St. Vincent College and a Masters in Historic Preservation from Middle Tennessee State University. He has worked at nine historic sites, written eleven books and over twenty articles. His research includes archaeology, colonial life, military history, and historic commemoration. Dunkerly is currently a Park Ranger at Richmond National Battlefield Park. He has visited over 400 battlefields and over 700 historic sites worldwide. When not reading or writing, he enjoys hiking, camping, and photography.
Emerging Revolutionary War is honored to welcome historian Malanna Henderson to the blog. A biography of Mrs. Henderson is at the bottom of this post.
Historical records are generally written by men about men.
When most of us think about the role women played in the Revolutionary War, Betsy Ross comes to mind. Why did early historians choose to recognize the contributions of Betsy Ross instead of others? We all know the answer to that question. Her contribution was sewing the American flag. Sewing, a traditional “female” occupation, was elevated to heroic heights by the legacy of Ross. Most historians today don’t name Betsy Ross as the designer of the first American flag, but that’s another story.
Women whose contributions didn’t fall neatly into categories that weren’t exclusively defined as “feminine” were intentionally excluded; and yet, without their contributions, big and small during the years that the war ensued, the war could have raged on longer or dare I say, we might be flying the Union Jack instead of the Stars and Stripes.
Heroism has many forms.
On the home front women maintained the farms, took care of livestock and fed, clothed and educated their children while their husbands took up arms against the British. That was how most women supported the war effort. However, as in the Civil War women were camp followers, accompanying their husbands and sons to the battlefield. For these women, the army could supply food and protection since they could no longer support themselves after their men left for war. In the military camps, women nursed the sick and wounded, laundered and mended uniforms and cooked meals. At some time in the war, women were paid for providing these services.
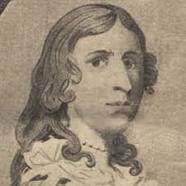
Then there were women who chose to pursue more daring endeavors, like spying or binding their breast, cutting their hair and donning men’s clothing to enlist in the war under an alias.
Deborah Sampson (courtesy of Fold3 by Ancestry.com)
I was recently reading the superb book by Patrick O’Donnell on Washington’s Immortals, which brought me back to a talk I did about the same Marylanders in the American Revolution a few years back. Below is an excerpt of that talk and highlights the second last stand for a regiment with a tradition of being steadfast when deadly duty called.
On March 15, 1781, approximately 20 men stood in the 1st Maryland Continental Regiment staring at the an eerie and familiar scene. It must have seemed that history was cruelly repeating itself once again. These men had survived the forlorn assault in New York in 1776, the ugly repulse at Camden in 1780, and now stood on third line of General Nathanael Greene’s defense at Guilford Court House.
Famous painting of the 1st Maryland at the Battle of Guilford Court House by H. CHarles McBarron, Jr.
Besides the 20 men who could be traced back to that fateful day in New York, the men that shouldered muskets in line with them were all veterans of indefinite periods of service as well.
The 1st Maryland and the men they confronted, 2nd Guards Battalion of Guards, were very similar, according to historian Lawrence Babits, who states that “the 1st Maryland was arguably one of the finest regiments produced by the Continental Army.
What ensued next was the defining moment of the battle and in essence the campaign. As the Guards officers gathered their men into a new line, the Marylanders came on at a rush. The Guards responded largely without specific commands…facing the oncoming Continentals, who fired several platoon volleys as they came. At a range of less than 12 yards, both lines fired again, so close that muzzle flashes overlapped into a wide sheet of flame and the heat from the volley could be felt.
Casualties mounted and at close range the musket balls shattered bone and even passed through the bodies of their targets.
Modern view from the location of Greene’s Third Line which the 1st Maryland held. Coming up the slight rise toward the photo was how the British approached.
The two sides then resorted to the bayonet and Williams recounted “the first Regiment embraced the opportunity…bayoneted and cut to pieces a great number of the British.”
Although the melee only lasted a few minutes, the Marylanders had checked the advance and with the dragoons of William Washington, allowed for Greene to begin to pull back and start the retreat. In another important position, Williams helped lead the rear-guard away from Guilford C.H. The Marylanders lost 15 killed, 42 wounded and 97 missing. Most of the missing could have came from the 2nd Maryland which broke in disorder on the left flank of the 1st Maryland.
Not only did the Marylanders suffer on that fateful March day in 1781, they did so with a lack of, well, everything. According to one inventory report, the entire regiment, numbering little over 300 men had not a single jacket, two-thirds were without proper footwear, and every man was destitute of a full complement of clothing. In addition, the men had served, fought courageously, and bled tremendously, without receiving one cent as pay.
A remarkable “band of brothers” that “held the line for independence.”
Which, in case you were wondering, was the name of the talk.
*Guilford Court House National Military Park is now preserved by the National Park Service, to plan your visit, click here.
*For information on Mr. O’Donnell’s book, click here.


